Repository
https://github.com/abhi3700/My_Learning_EOS
What Will I Learn?
[IMAGE: https://cdn.steemitimages.com/DQmZn4Tg5aADZEGjMFdTHHiLdAuu4Fvn1NrKmLFyYeSxacC/eosio_wallpaper.jpg]
- This is for enabling your system to run EOS Smart contracts (SC).
- This is for Installation on Linux (Ubuntu). Here, WSL is used.
Requirements
Complete these steps below and then proceed with the main installation steps ahead.
- open cmd.
>pushd directory-where-eos-folder-is-to-be-kept>bash- Now, you are ready with following the steps below.
Difficulty
This is basic level tutorial which is based on setting-up the system for EOS smart contracts compilation & debugging.
Tutorial Contents
Follow these steps for Installation.
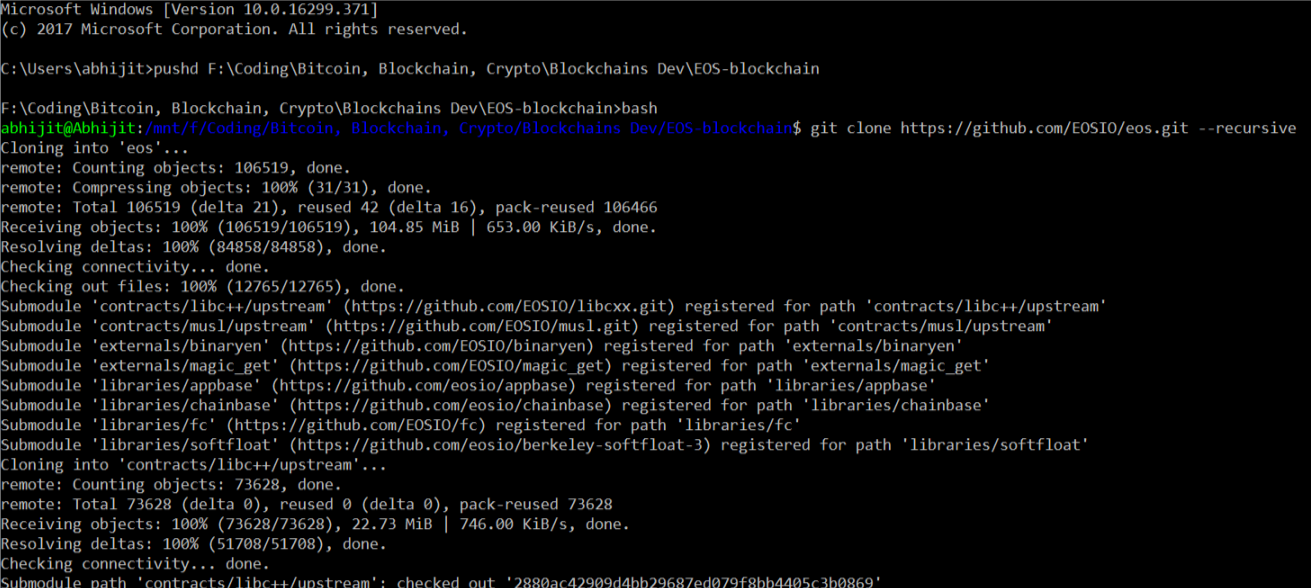
* Cloning the github repository
Command - $ git clone https://github.com/EOSIO/eos.git --recursive
[IMAGE: https://cdn.steemitimages.com/DQmZs8CGrQU1PasDgfyotWqNW7YUoe1Z2AfW5oZJgM2ry3u/eos_setup_1.png]
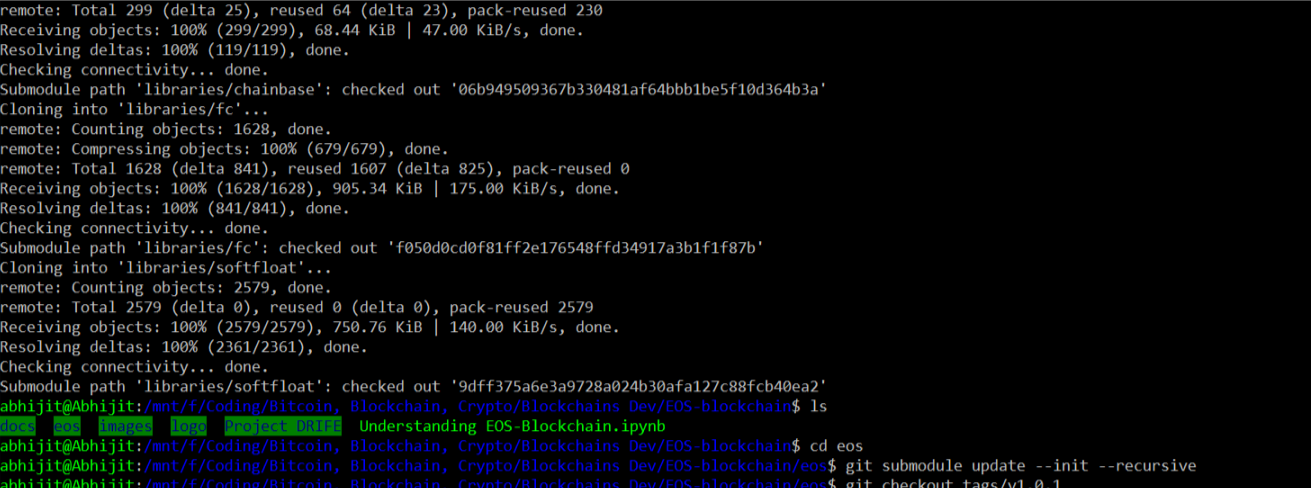
- Now, goto the eos folder
Command -$ cd eos
[IMAGE: https://cdn.steemitimages.com/DQmd6uvg9L2JWcVea57aPDHqGvUwQhTErndrgtrqQYs9XfN/eos_setup_2.png]
- submodule check
$git submodule update --init --recursive
Nothing appears. So, no screenshot.
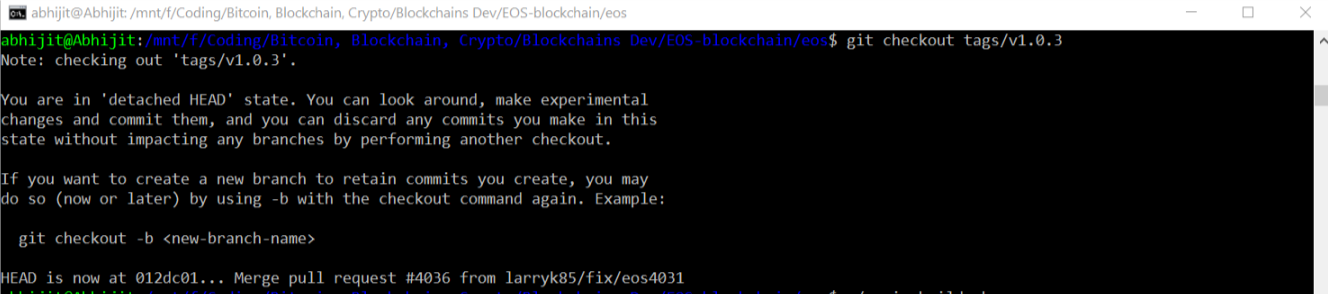
- Latest version
Goto - https://github.com/EOSIO/eos/releases/latest
It will take you to the latest release version page (e.g. v1.0.3, v1.0.2, v1.0.1, etc). Get the version no. from here.
$ git checkout tags/v1.0.3
[IMAGE: https://cdn.steemitimages.com/DQmQJBFrYg9s9kgywGHC1TMs8YuYX2nXgNFsh4oaaubtxVH/eos_setup_3.png]
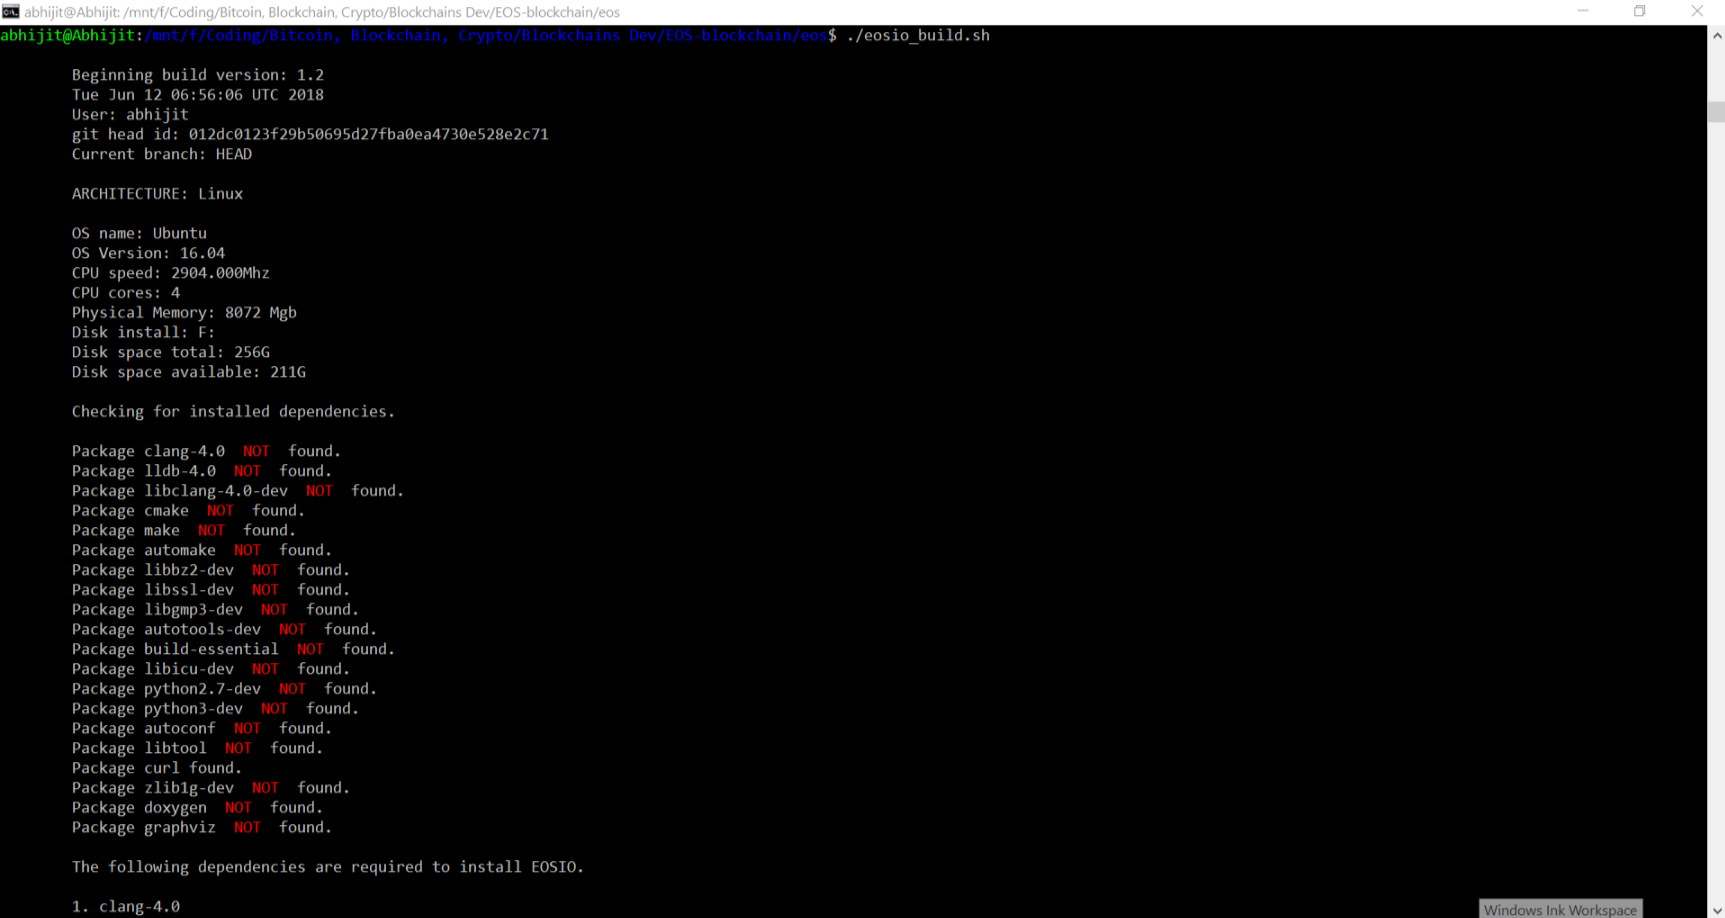
- Building the tools for eos-dev
```$ ./eosio_build.sh
[IMAGE: https://cdn.steemitimages.com/DQmRtZERr31wvNWyzybuaBZZcLbbYTsV7KKU8caBHX6VqW3/eos_setup_4.png]
-
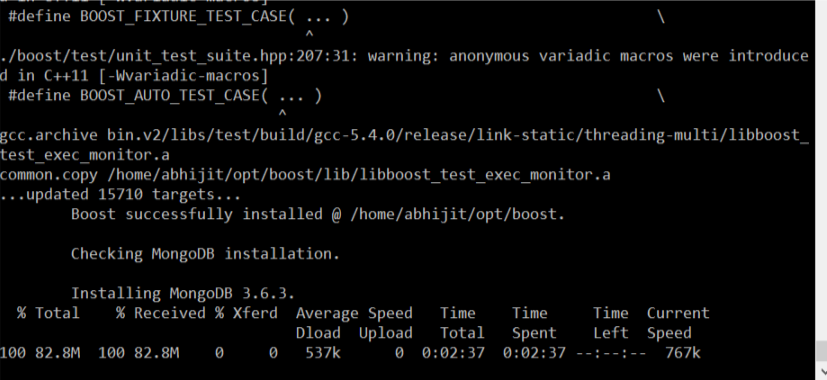
Boost installation -
Different libraries are installed.
[IMAGE: https://cdn.steemitimages.com/DQmXPqtq657Qwq885YD4i5H8JtUvMJeQC1szfKCMGDwomn5/eos_setup_5.png] -
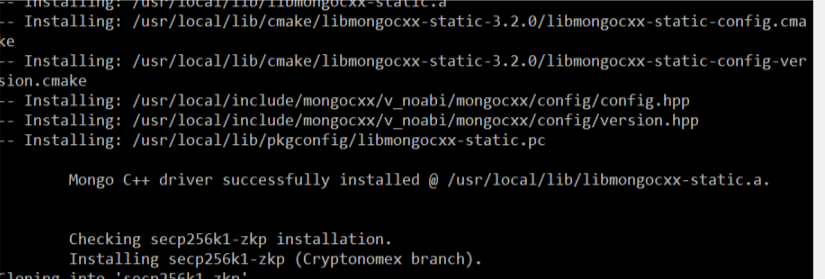
Mongodb & Mongo C++ driver installation -
Mongodb and C++ drivers are installed here.[IMAGE: https://cdn.steemitimages.com/DQmPbYZYqiqTUtqptP6kDcdGy12CMn98nNREPrn41dy4YB8/eos_setup_6.png]
-
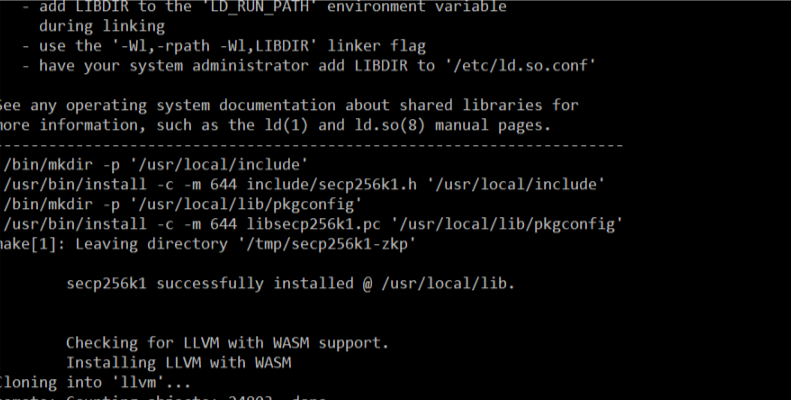
secp256kl installation -
Schnorr Signatures cryptography libraries are installed here.
[IMAGE: https://cdn.steemitimages.com/DQmPWBZrA4PREkz2oYS7tvaSgwWmLRNgG93EBgHbHV4oDFu/eos_setup_7.png]
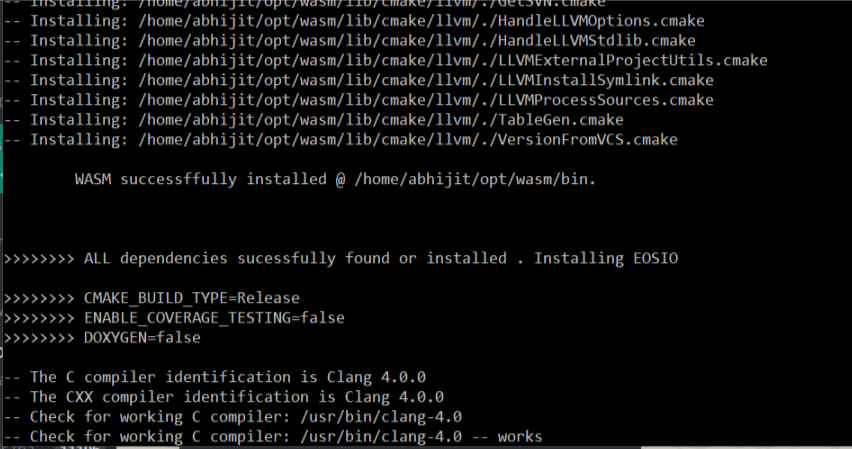
- WASM installation -
wasm programming libraries, tools are installed here.
[IMAGE: https://cdn.steemitimages.com/DQmR66gNZKdyx7QzKJxtnZwiquA3BFgLbr5r4z161u25psh/eos_setup_8.png]
- EOSIO installation -
[IMAGE: https://cdn.steemitimages.com/DQmWE2ZN3YyTzmdzKUoSjAuTXCzxQtua3xcTMkk7RDMX6ee/eos_setup_9.png]
-
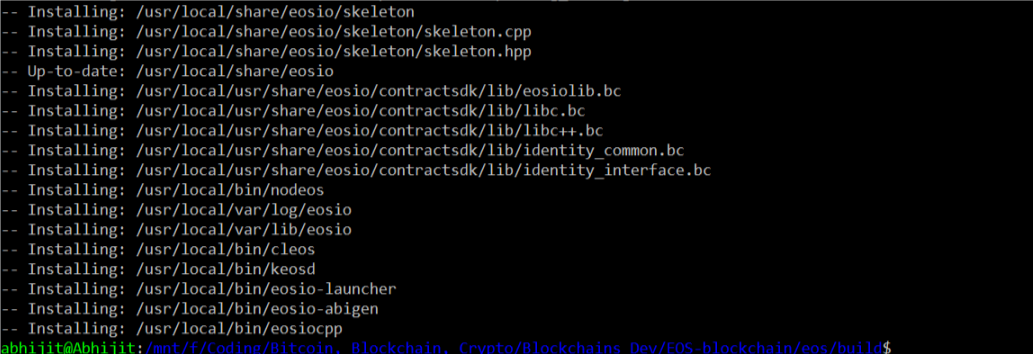
Make install
$ cd build
$ sudo make install
[IMAGE: https://cdn.steemitimages.com/DQmXYG7qWcixUNd2XUKMtx9v5bmn2HEZTtP46XpLXCUAhXv/eos_setup_10.png]
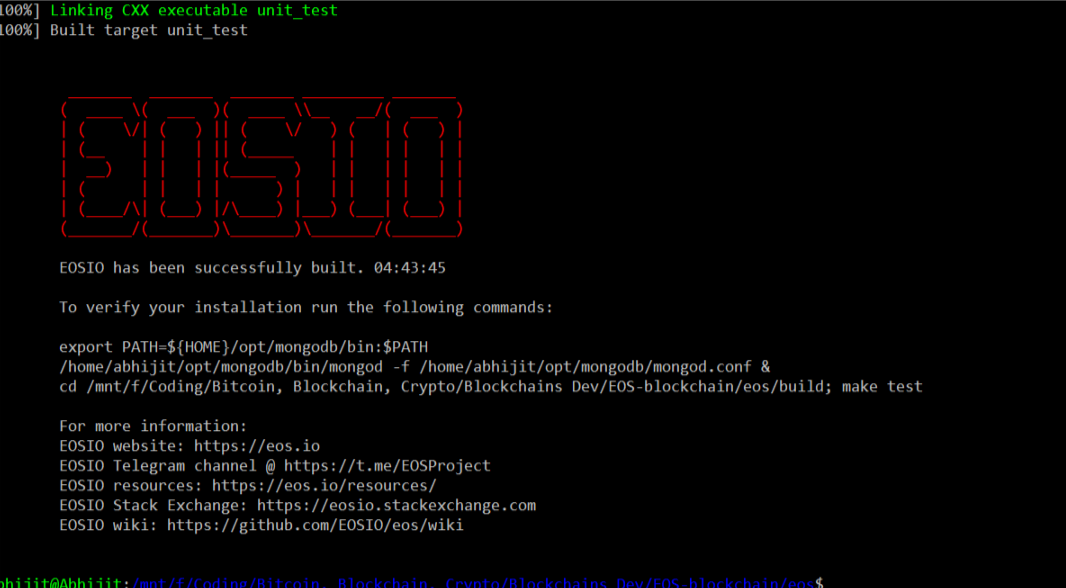
Now, Everything is installed!!...
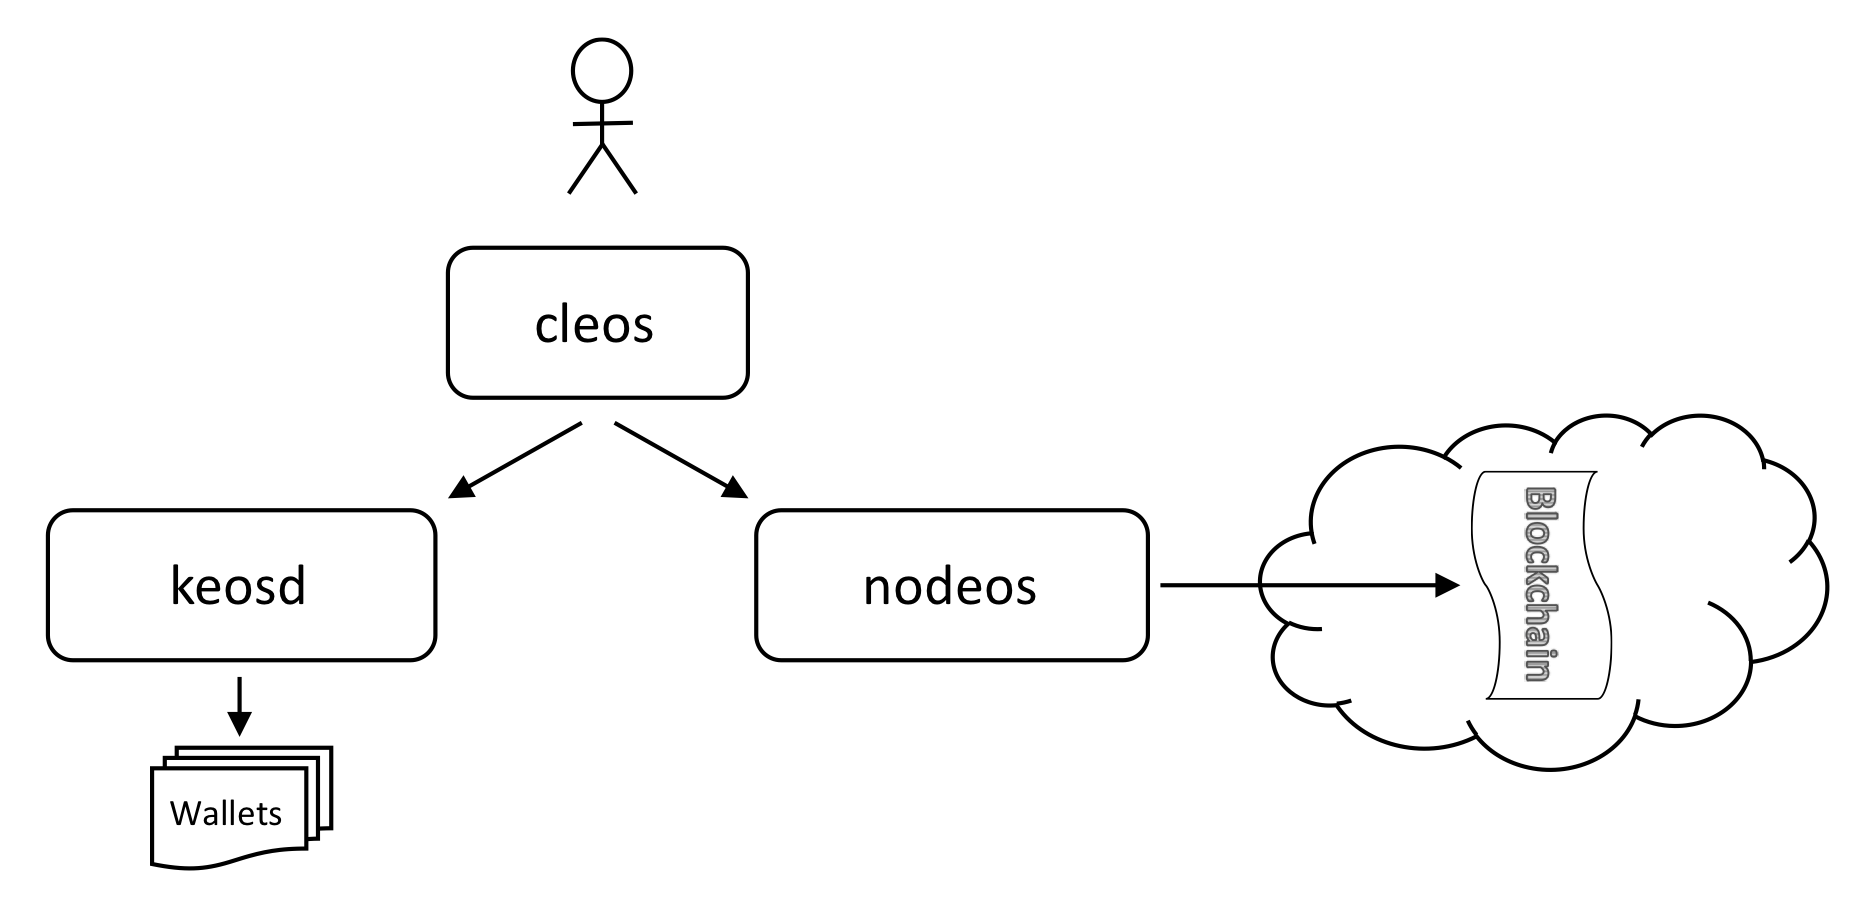
EOS_io system architecture
The figure below explains that how these 3 commands are interconnected with each other.
-
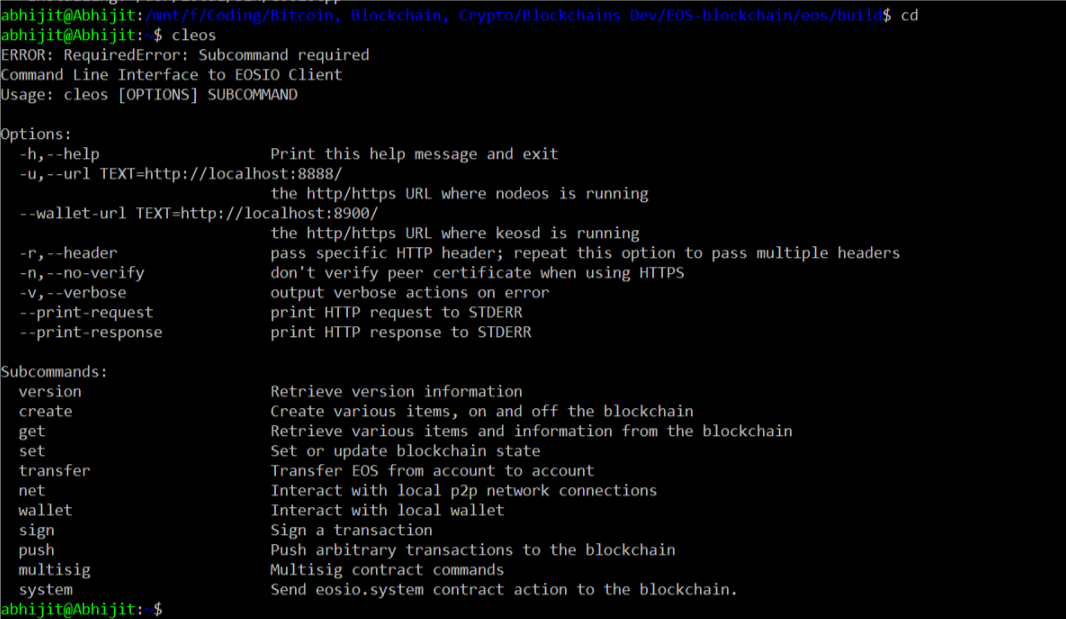
cleos$ cleos- command line tool for the EOS blockchain.
[IMAGE: https://cdn.steemitimages.com/DQmV76s8z2T2YaNZyLhEGjAeGcdTy1m4GqxbfTwa5fMtBov/eos_setup_11.png]
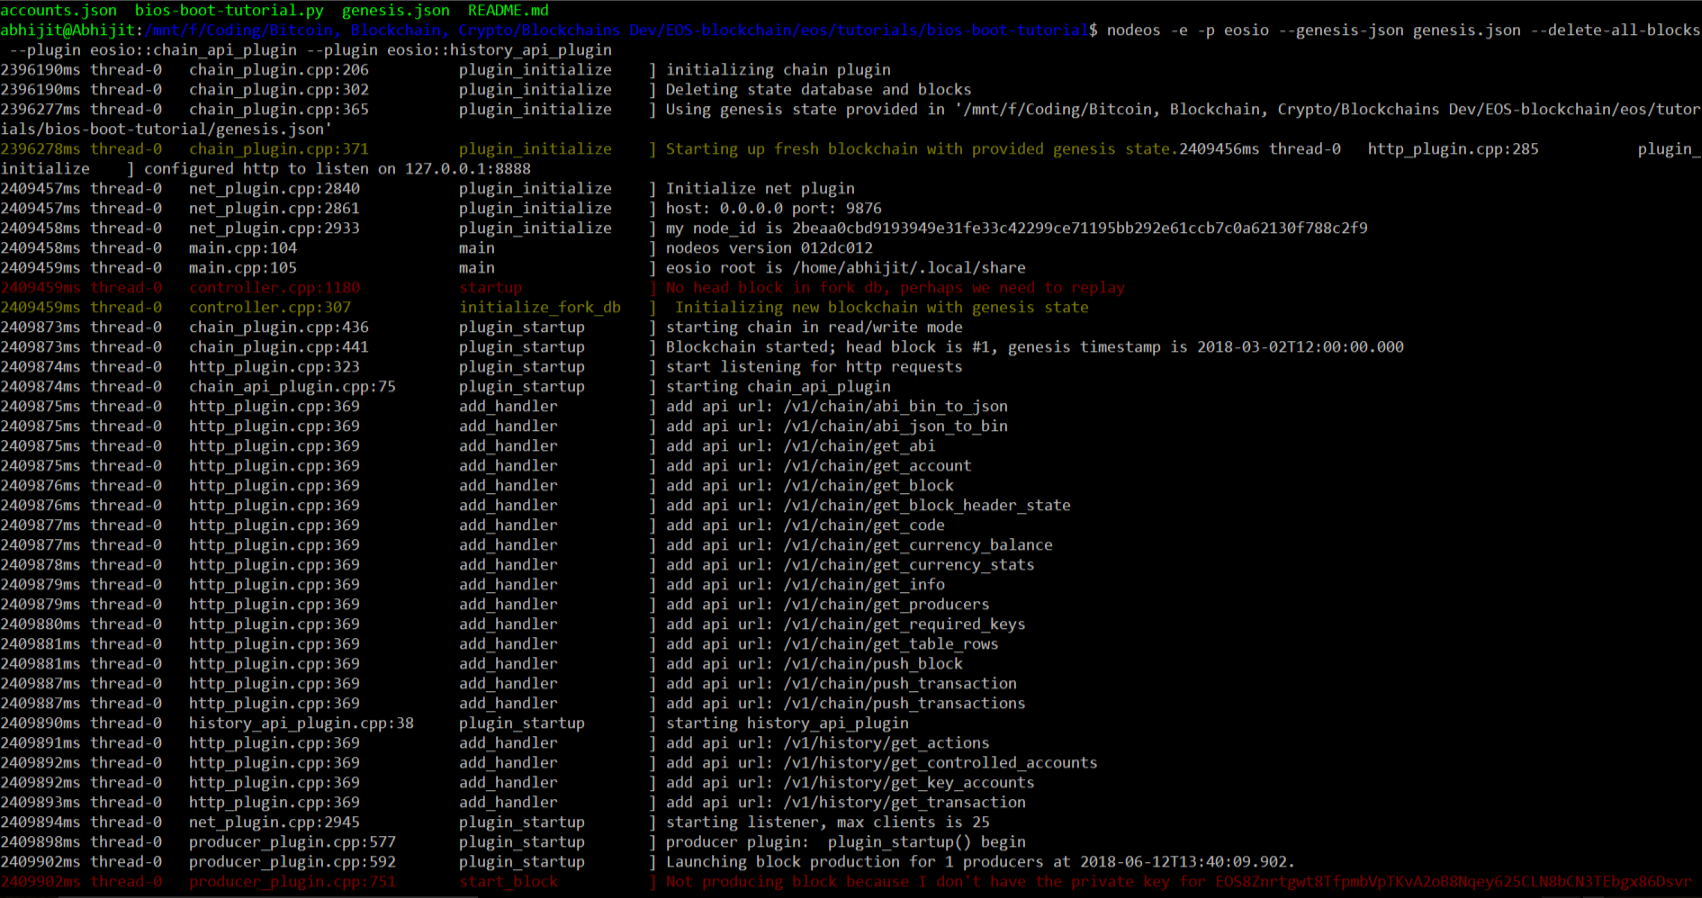
nodeos
For interacting with the blockchain.
[IMAGE: https://cdn.steemitimages.com/DQmbHCFVxYGpUAuTCyFobsizcYcBSHNVpzVfh7fY5yDxVj3/eos_setup_12.png]
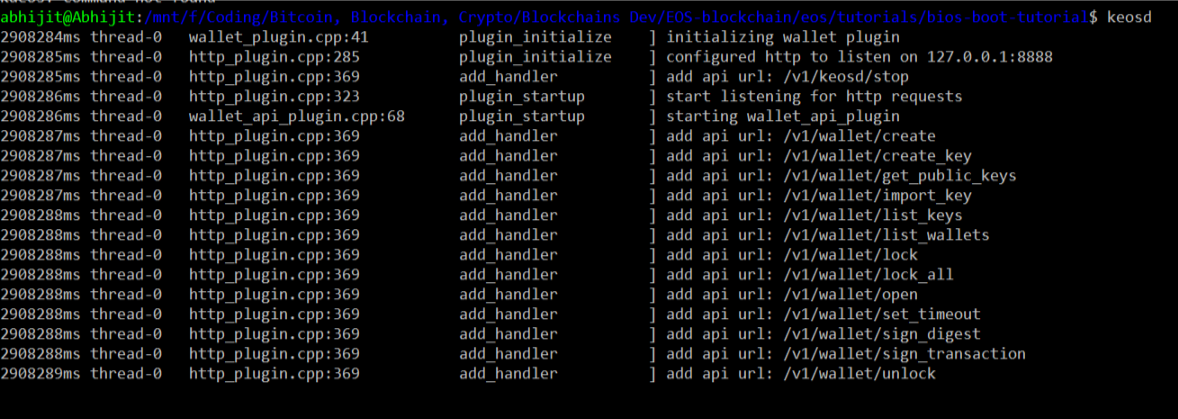
keosd
For accessing the wallet.
[IMAGE: https://cdn.steemitimages.com/DQmba1kTtJHzVnUm6rySGQz1vy4K4Qs3VPbfivKDsrqM5d7/eos_setup_13.png]
Curriculum
This is the first tutorial. No such curriculum.
Proof of Work Done
Code url - https://github.com/abhi3700/My_Learning_EOS/blob/master/EOS_setup.md