Repository: https://github.com/angularjs
What will I Learn?
In this tutorial, you will learn the following
- Implement a dynamic Complimentary card for business
- Use Angular JS to write text to HTML Canvas
- Use Angular JS to draw objects / images to Canvas
- Position elements within a Canvas
- Download Canvas image
Requirements
For this tutorial, you will need the following
- A laptop with any operating system such as Windows OS, Mac OSX and Linux
- Your favorite text editor like Atom, Sublime Text and so on.
- Knowledge of HTML, Bootstrap and JavaScript
- Knowledge of HTML Canvas
- Design tool such as Photoshop or CorelDraw
- ANGULAR JS script or include it using the cdn link
Difficulty
- Basic
Tutorial Content
> Angular JS framework which operates exactly as Javascript, makes coding more simplified and easy to use with other programming languages.
> Angular JS framework can be used to achieve variety of functionality and gives user more options and flexibility in implementing their designs and functionalities.
We might already know how to use the HTML Canvas using JavaScript but we intend using Angular JS framework for speed and efficiency. In this tutorial we intend creating dynamic ID card that can be generated by staffs of an organization.
Step 1: Getting Started
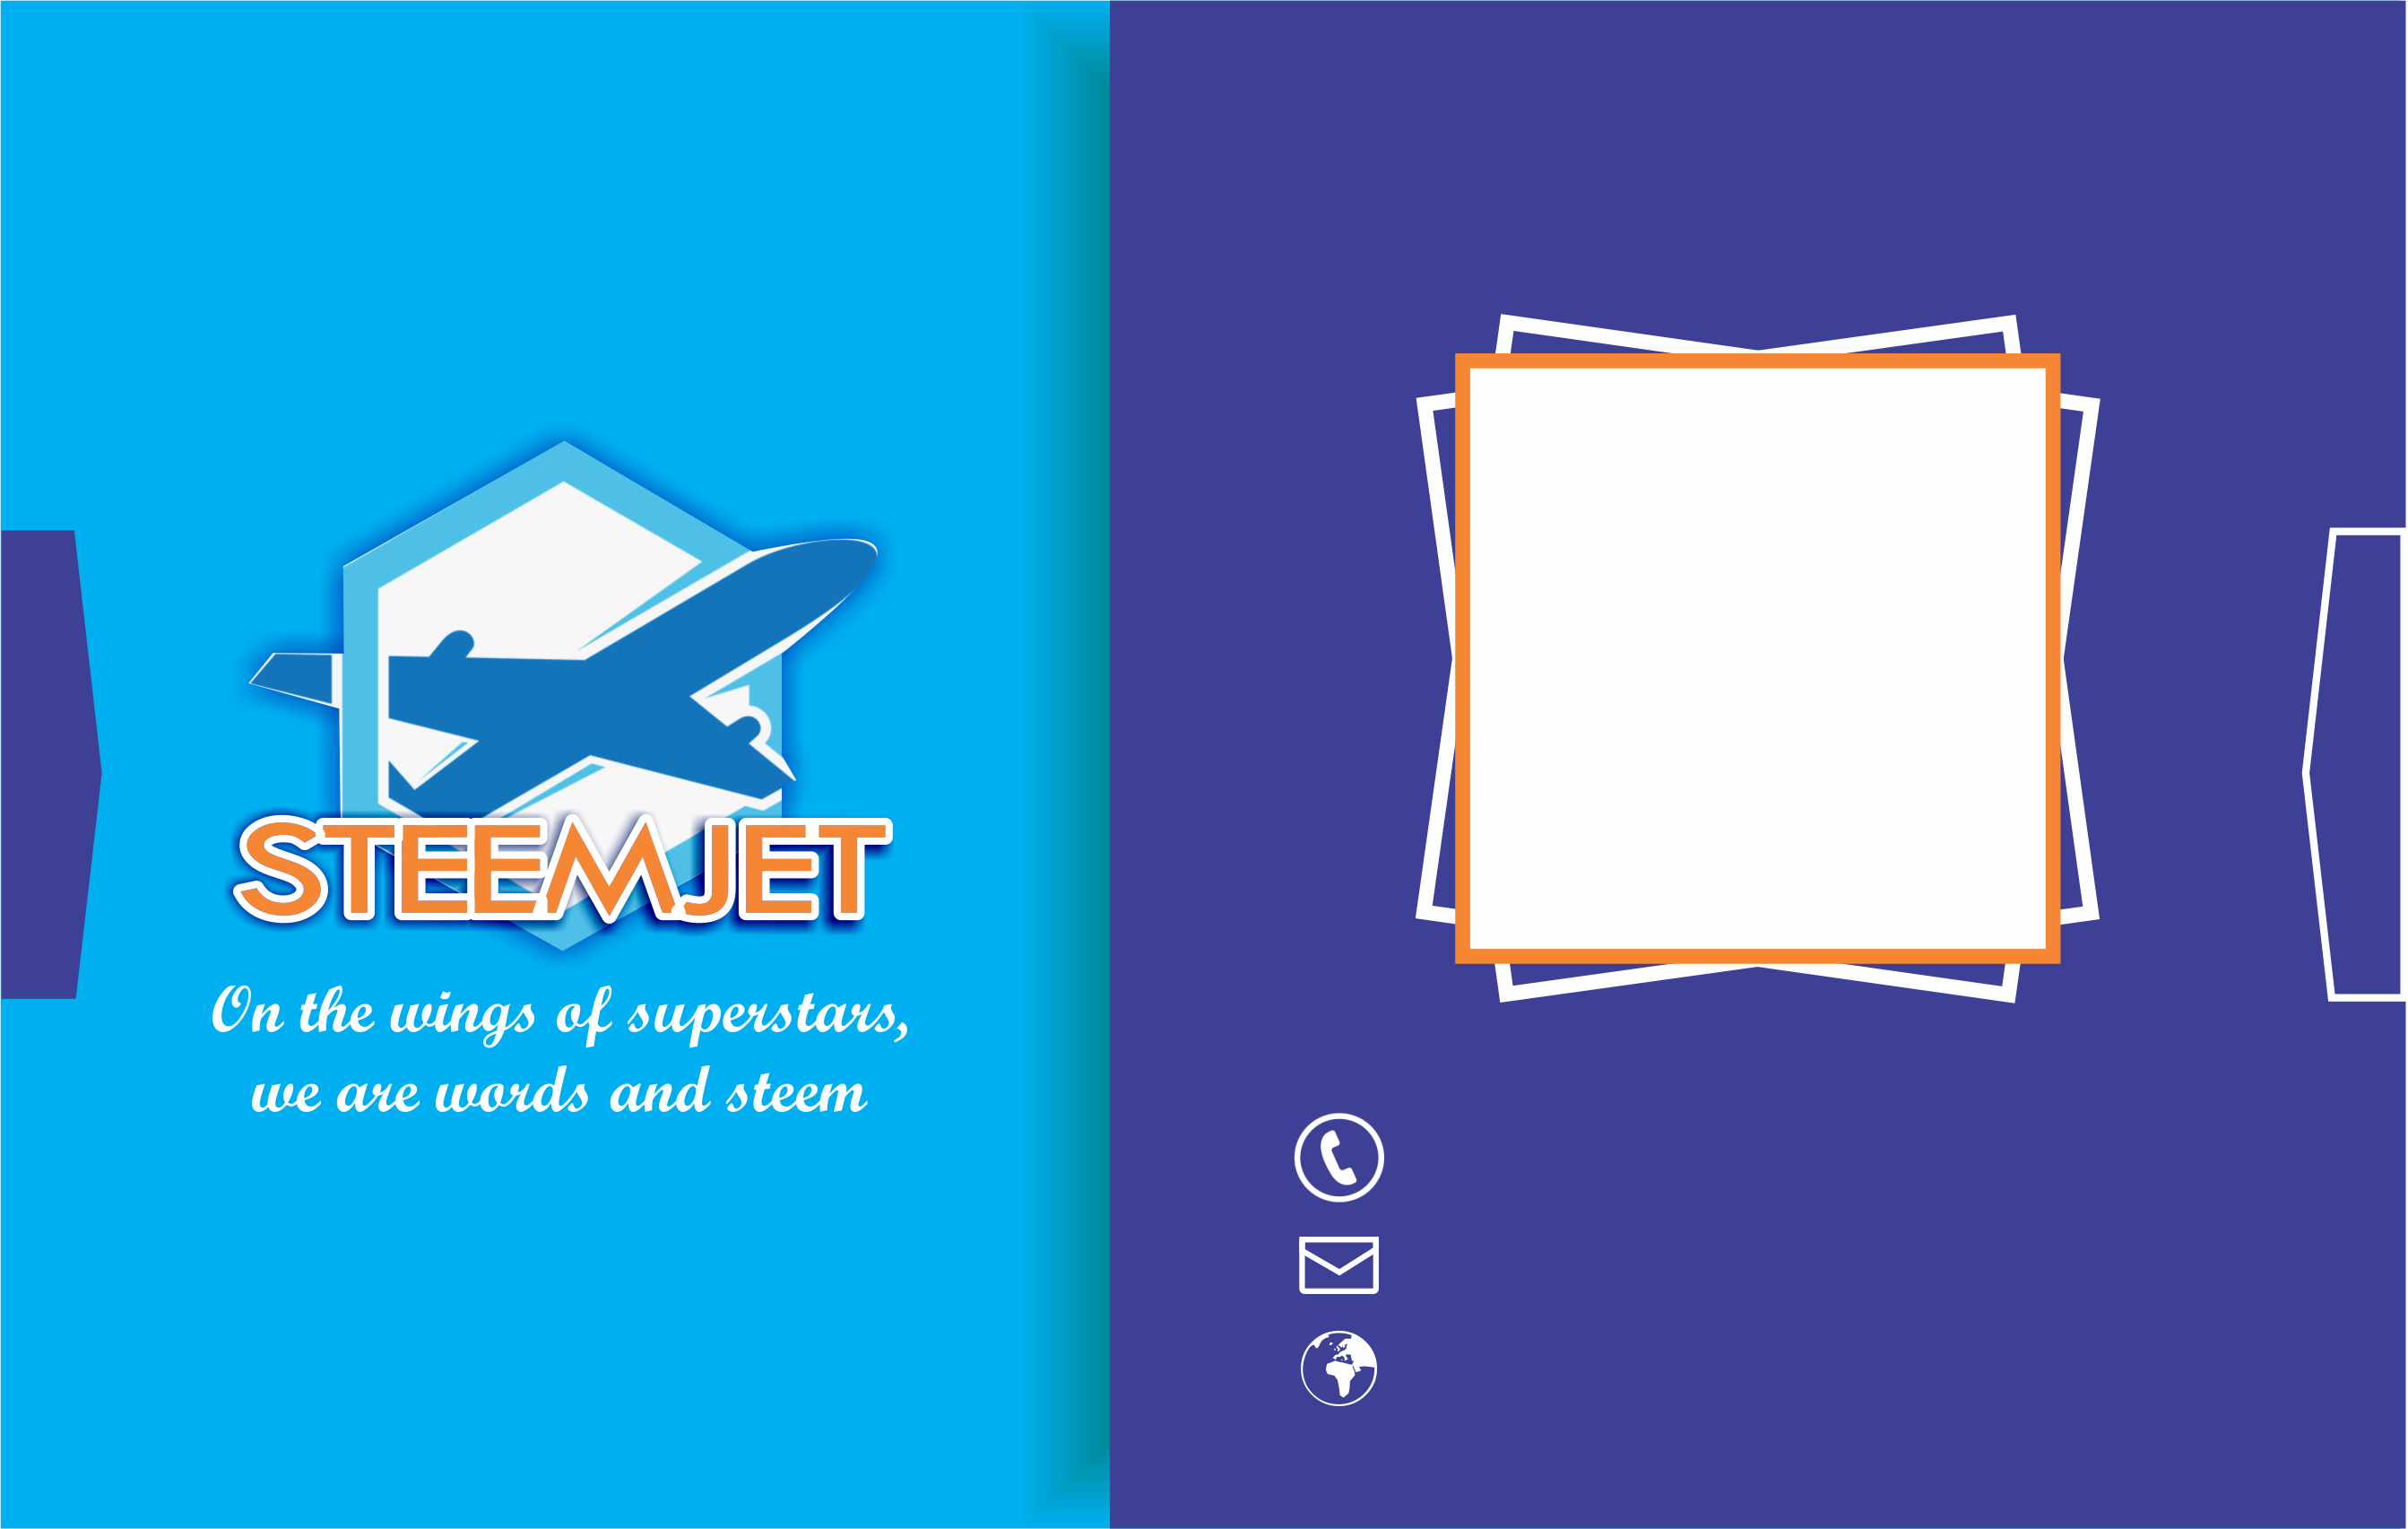
For this tutorial, we need to design a template of the ID card carrying fixed element contents for example:
- Company Logo
- Company Name
- Image placeholder
The fixed elements are contents of the ID card that are not meant to change from one staff/user to another.
[IMAGE: https://cdn.steemitimages.com/DQmdEW6nVZdRsTFUT89qP8ZXintN8niQKx2FifNjXenCsE9/template.png]
[IMAGE: https://cdn.steemitimages.com/DQmUP1Koeoof8FbYKju1vP1CGmuGDjuGzLuzfYtpD9Lfv9T/Sample.png]
You can design your own ID card template using any design tool that you are familiar with and then export the design as either PNG (Portable Network Graphics) or JPEG (Joint Photograph Export Group). But for this project I exported my design as PNG (Portable Network Graphics). A sample of my ID card template is located in assets/img/patterns/template.png and the complete preview is located in assets/img/patterns/sample.png. Those can serve as a guide in designing your own card temple for this tutorial.
Step 2: Starting out template
To begin, we start with the default html template with the head and body tags. We link all necessary script files within the head tag, including our angularjs script. We also need another JS file called app.js where all our angular implementation details will be performed and also another JS script file for Javascript implementation details.
index.html
Bussiness Design
> Note: Our index.html file contains some new attributes within the html tag and another within the body tag.
>
> - ng-app="myApp" is an angular directive that triggers angular js to function with the HTML DOM that it covers. It tells angular JS the area of the HTML to take charge of.
> - ng-controller="MainCtrl" is an angular controller created within the angular script app.js for manipulation of a particular area of the HTML DOM.
app.js
(function (){

  var app = angular.module('myApp', []);

  app.controller('MainCtrl', ['$scope', function($scope) {


  }]);


}());
We first have to create a directive in our blank app.js script file which allows us create a controller which is in-charger of a particular area of our html file. To create a directive, you call the angular.module() which requires the following parameters;
- a name which is
myAppand; - an empty array
[]for dependencies such as$scope,$http,$logand so on.
The controller is then built based on the app directive that has been created earlier. We begin the controller with a controller name MainCtrl, a single dependency $scope and then a function with $scope as the only parameter of the function.
NOTE: The $scope parameter can be accessed anywhere within the confines of the MainCtrl controller in the html. Our script.js file will be blank for the mean time and check your console to find out if we have any errors generated before proceeding to the next step.
Step 3: HTML Canvas
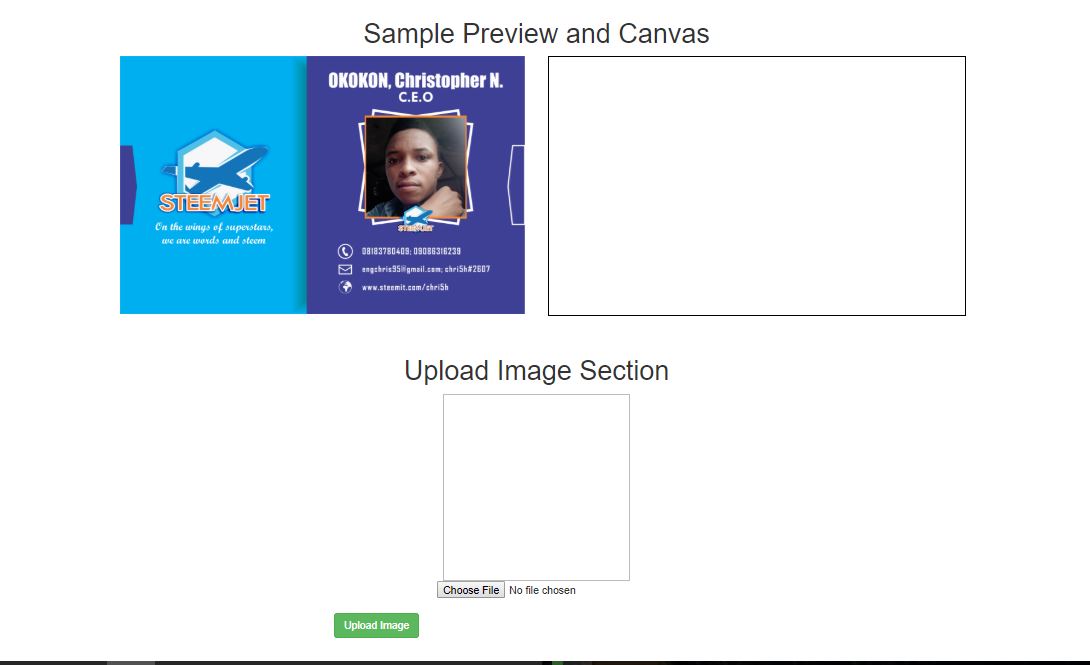
The HTML Canvas is an element which is used to draw graphics on a web page, We learn to utilize it better by drawing multiple graphics within the canvas element, including text. We want to create a canvas that draws the template into the canvas. For the design of the site, we will be using bootstrap.
Sample Preview and Canvas


            Upload Image
Within the body tag, we have in container that holds two separate columns. One carries the sample image and the other the canvas element where we will be drawing the template for further manipulations.
- The canvas element carries and
id = "myCanvas"with specified width and height as well as a border so we can see its size. - The button tag below the canvas element uses the angular
ng-clickdirective to trigger thedraw()function within the angularMainCtrlcontroller.
app.js
$scope.draw = function draw () {
    //Draw canvas
    var canvas = document.getElementById('myCanvas');
    var context = canvas.getContext("2d");
    // Create Objects
    var imageObj = new Image();
    // Declare objects sources
    imageObj.src = 'assets/img/patterns/template.png';
    // Specify Width and height of each object
    var width = 555.753;
    var height = 344.471;
    // Draw the image objects into the canvas
    imageObj.onload = function() {
    context.drawImage(imageObj, 0, 0, width, height);
    }
};
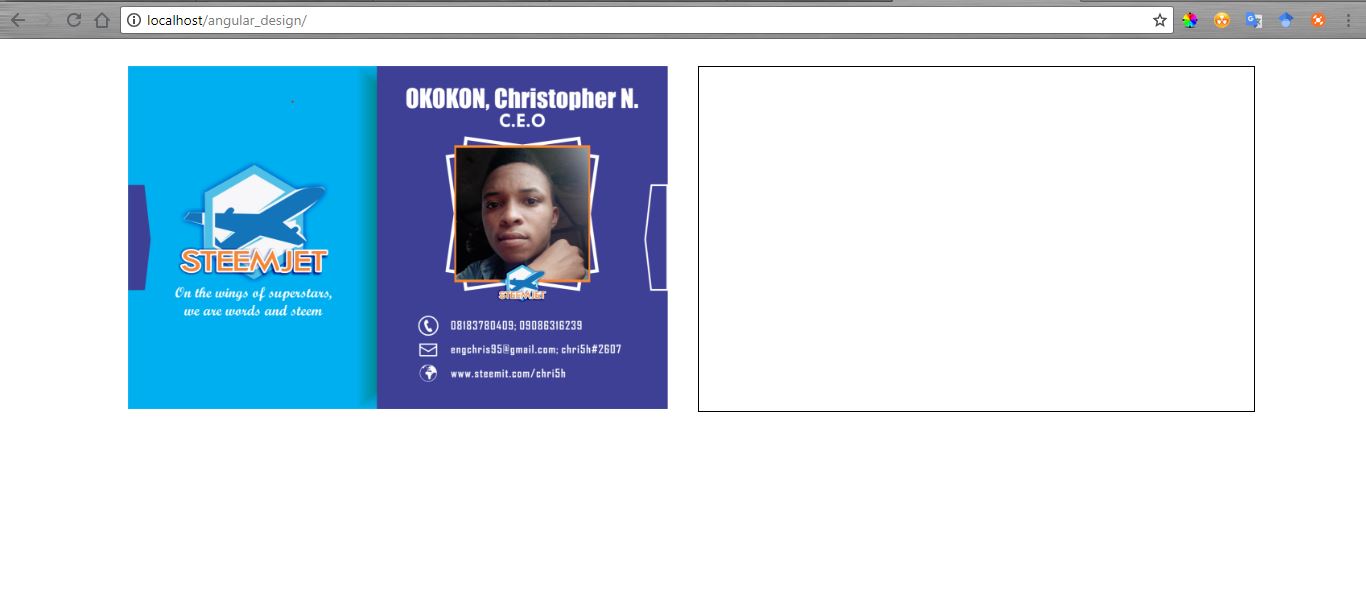
When the button is clicked, angular executes the draw() to draw the template to the canvas we have created within the HTML tag.
-
Line 3: Gets the canvas element using the canvas id
myCanvas -
Line 4: Creates a drawing object using an HTML built in function
getContext()which has properties and methods -
Line 6 & 8: This steps defines an object to be drawn on the canvas and sets the object / image source.
-
Line 10 & 11: You can also then specify the width and height of the objects should incase they are bigger in size than desired.
-
Line 13 & 14: Draws the image unto the canvas once the object or image loads using the
drawImage()providing the following properties:
js
  context.drawImage(imageObj, hPoint, vPoint, width, height);
- imageObj: The image source to be drawn on the canvas
- hPoint: The starting point of the
imageObjon the horizontal axis - vPoint: The starting point of the
imageObjon the vertical axis - width: The width of
imageObjto be drawn - height: The height of
imageObjto be drawn
[IMAGE: https://cdn.steemitimages.com/DQmTkbHTE1j47kdBUpaU2igRCTqUWADwxXsGWkaDHq2utxt/Canvas%20Image.JPG]
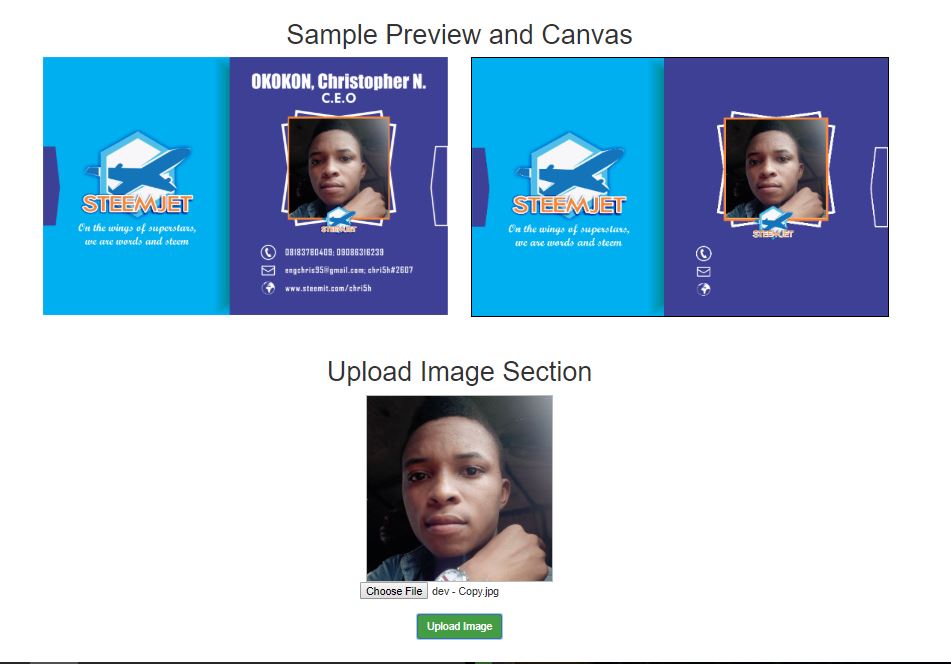
Step 4: Draw Uploaded Image on Canvas
The template design and sample design now looks similar, but the only difference is the image of the staff, name and other details below the staff image. We will modify our code snippet so we can upload different images and draw the image to the canvas.
First we will remove the previous upload button, and create a new section that will house the upload button which will re-implemented to upload the selected image and then draw the image on the canvas at our specified position.
Upload Image Section


            Upload Image


<
Also we need to add the following JavaScript event to help fix the image to the clock div and as well upload the image to the image tag with id="imageP" so we can pick the image source for upload to the canvas.
[IMAGE: https://cdn.steemitimages.com/DQmaqEe62YwhkPD3Sgj8k7FFXoJgSRB4sbm6hthaPE78Kdc/upload%20preview.JPG]
> The code snippet can be added below the body tag.
    $("#details").hide();
    $("#final").hide();
    function readURL(event){
        var getImagePath = URL.createObjectURL(event.target.files[0]);
        $('#clock').css('background-image', 'url(' + getImagePath + ')');
        $("#imageP").attr('src', getImagePath);
        $('#imageUploadBtn').css("display", "none");
    }
Note: This script executes on when the value of the input file type changes using the jquery onchange().
- This script first gets the image file path to be uploaded and then sets it as a background-image to the div with
id="clock"through CSS which acts as a preview to the user. - Then the invisible trick not know to the user is the fact that we set the image path as a source to the img tag with
id="imgeP"which is hidden by default from the user.
app.js
$scope.draw = function draw () {

    var x = $("#imageP").attr('src');
    //Draw canvas
    var canvas = document.getElementById('myCanvas');
    var context = canvas.getContext("2d");
    // Create Objects
    var imageObj = new Image();
    var imageObj_01 = new Image();
    var imageObj_02 = new Image();
    // Declare objects sources
    imageObj.src = 'assets/img/patterns/template.png';
    imageObj_01.src = x;
    imageObj_02.src = 'assets/img/patterns/Logomask.png';
    // Specify Width and height of each object
    var width = 555.753;
    var height = 344.471;
    var width1 = 133;
    var width2 = 57;
    var height1 = 130.6;
    var height2 = 49;
    // Draw the image objects into the canvas
    imageObj.onload = function() {
        context.drawImage(imageObj, 0, 0, width, height);
        context.drawImage(imageObj_01, 339.5, 82, width1, height1);
        context.drawImage(imageObj_02, 373, 195, width2, height2);
    }

    $("#upload").hide();
    $("#details").show();

};
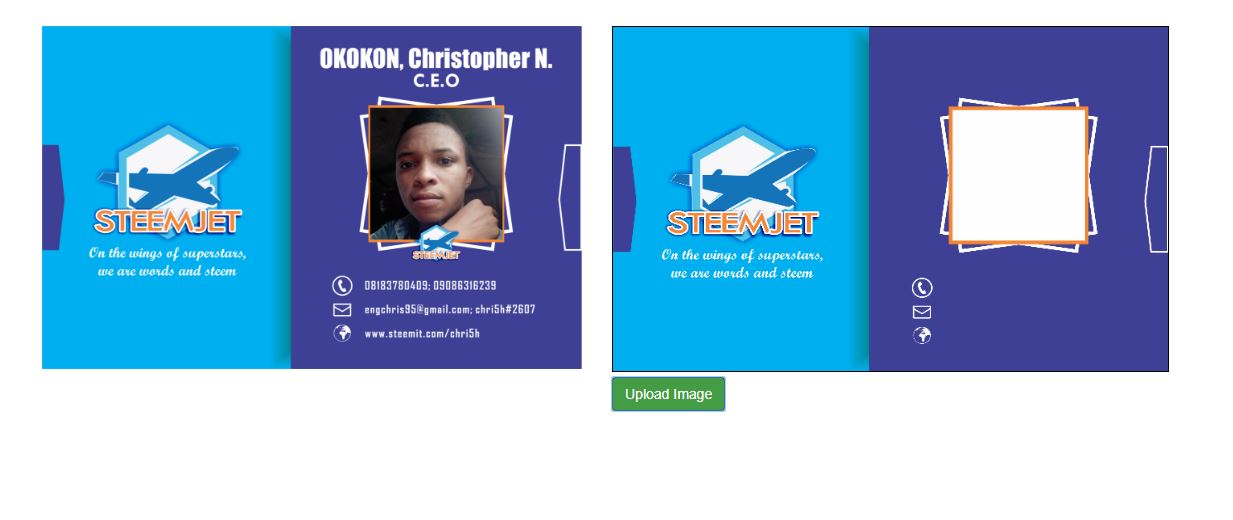
NOTE: The upload button looks similar to the previous one, but the difference is that we added new objects to be drawn to the canvas at various positions.
- For every object to be drawn, we create a
new image()and give it a value. - Two of the objects (imageObj and imageObj_02) to be drawn , has path already defined by the script except the image uploaded. So to get the image, we retrieve the source of
id="imageP". - The heights and width of each imageObj is specified to fit the desired design.
- We then carry out a try and error on the vPoint and hPoint of each imageObj based on the design. This is to enable you fit the image at the right position of the design.
- The object meant to be be above another is drawn last, so it appears above other objects.
- The last two lines 29 & 30, is to display a form for user details for drawing and hides the upload image form.
[IMAGE: https://cdn.steemitimages.com/DQmVeeRL53yuvyyG6vVEanTG7UmjrUsG4cJbCLhNjYYuEYu/uploaded%20preview.JPG]
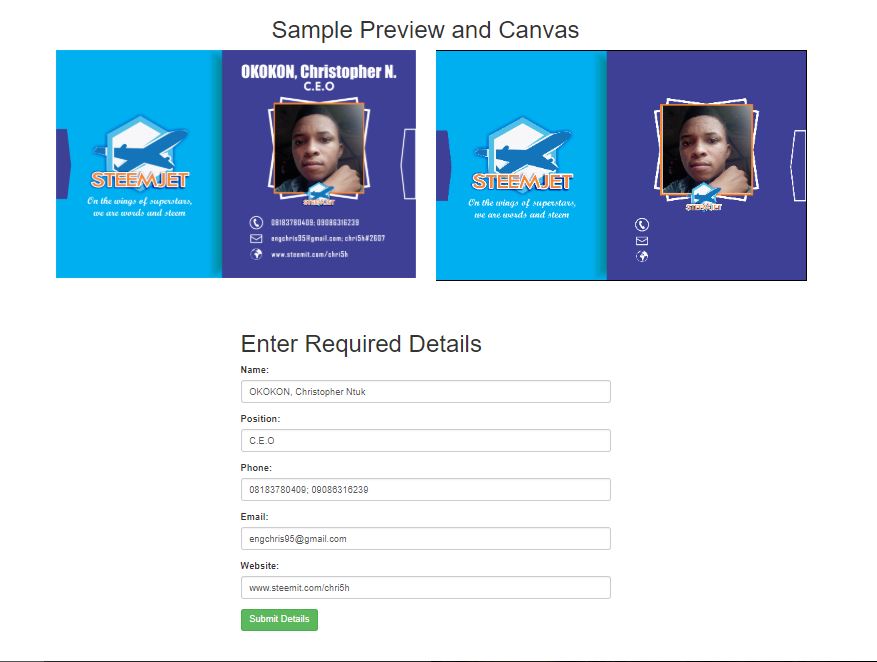
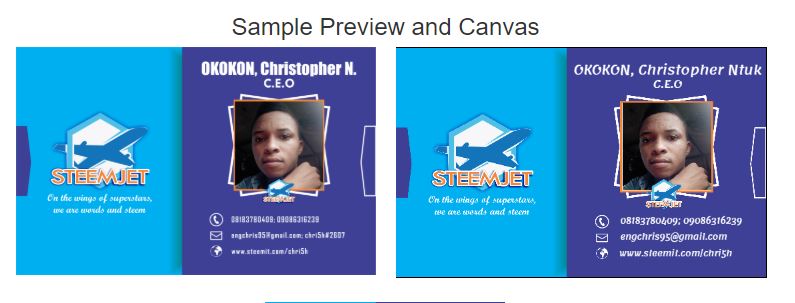
Step 5: Add the text to the Design
Including the text at various positions of the canvas is actually implemented same way we implement the positioning of graphics or objects on the canvas. We get the text from users as we tend to allow the template content to be dynamic based on the user details. We use HTML form to collect the details and use the angular ng-model directive for two-way data-binding. We also needed to limit the number of characters per input fields.
Then when the form is submitted, we invoke the angular function called submitWriteUp and pass in the form details as parameters (using angular two-way binding) of the function so we can draw each form detail on the already created canvas myCanvas.
index.html
Enter Required Details


                        Name:


                        Position:


                        Phone:


                        Email:


                        Website:


                        Submit Details
[IMAGE: https://cdn.steemitimages.com/DQmNMSZsMhiftAzM21p1aYc8jcsVqKzjR5q2ePfmTAcah7y/form%20preview.JPG]
When the form is submitted and we receive the form details, we will draw the details on the canvas at various position based on your design. The steps to drawing the text are as follows:
-
First we select the canvas
myCanvaswe want to draw on -
Create a drawing object using an HTML built in function
getContext()which has properties and methods. -
We define the middle of the canvas using
canvas.width/2. This gives you the middle of the canvas. -
For each text to be drawn, you can define:
-
context.font: this defines the font and size of the text to drawn.
- context.fillStyle: this define the color of the text.
-
context.textAlign: this define alignment of the text whether center, left or right.
-
Then, we can now draw the text on the canvas using the
context.fillText()function with the following parameters: -
name: the text to be drawn on the canvas
- hPoint: The horizontal position of the text to be drawn
- vPoint: The vertical position of the text to be drawn
> Note: The vPoint and hPoint can always very based on your template design so you tend to change the values and preview if it matches your desire else continue to change the value of the points.
app.js
$scope.submitWriteUp = function (name, position, phone, email, website) {

    var canvas = document.getElementById('myCanvas');

    var context = canvas.getContext("2d");

    var middle = canvas.width/2;

    context.font = "19px ExoRegular";
    context.fillStyle = "#fff";
    context.textAlign = "center";
    context.fillText(name, middle+130, 40);
    // Other  writeups drawn with different style
    context.font = "17px ExoRegular";
    context.fillText(position, middle+130, 60);
    context.font = "12px ExoRegular";
    context.fillText(phone, middle+150, 264);
    context.fillText(email, middle+139, 288);
    context.fillText(website, middle+142, 313);
};

$scope.submitWriteUp();
$("#final").hide();
> Note: To specify new fonts, style and textAlign for different details, you need to specify the values of this parameters before drawing the text.
[IMAGE: https://cdn.steemitimages.com/DQma835seh71yN98sQP59vrJYRFuHiPxskZqbnBgdoUBcsR/textPreview.JPG]
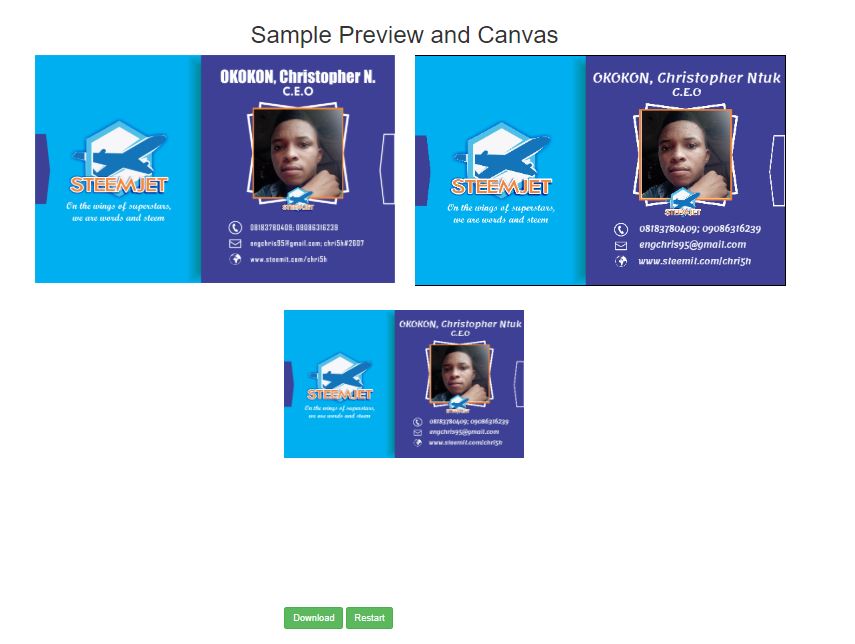
Step 6: Download the Canvas as image
The final step is to download the generated image within the canvas. One simple way is for the user to right click on the canvas and select "save image as" and select a location where it will be saved and the image will be download.
But we want to hide the form details and display a final preview of the image with a button to download the image by clicking on the button. So we can add some code snippet within the submitWriteUp scope function so that we can attach the image to a final and the button for it to be downloaded.
So we create a new section with an id, within it is a div with id="finalPreview" to hold the final image and then a button for downloading the image with id="download".
index.html
We need to modify our submitWriteUp scope to append the image within the canvas to the finalPreview div and also the href of the download button. We will add the code snippet below within the submitWriteUp scope function.
app.js
    img.src = canvas.toDataURL();
    var src = canvas.toDataURL();
    var image = '';
    $('#download').attr('href', src);
    $('#finalPreview').prepend(image);
    $("#final").show();
    $("#details").hide();
> Note:
>
> - Line 1 and 2 converts the image within the canvas to a URL which hold the image data.
> - Line 3 we create an image which will be appended to finalPreview as a preview of the canvas image.
> - Then the source src of the image is added as the href of the download button for download.
> - Then we can now hide the details section and display the final section with the download button.
[IMAGE: https://cdn.steemitimages.com/DQmTSkoh7oQDnRA6UB75rNkP8PKFeyJhXYEyb4s9fGhhsAh/DownloadOption.JPG]
SAMPLE PREVIEW OF THE DOWNLOADED IMAGE
[IMAGE: https://cdn.steemitimages.com/DQmXNHAs6URV3gMPqfcq41XrcUMJJVKJHEJb1cC9iQRUU4U/steemjet%20(2).png]
.png)
> Please uncomment all image tags within the code snippets when using them because while uploading this post, I had image upload conflicts. Thanks
Check out full code snippet for this step in index.html, app.js and main.css.
Video of Work Done
Previous Tutorials
-
-
Proof of Work Done
I hope you find this tutorial very useful and you can access the complete code for this tutorial in the github repo.