Repository
https://github.com/tensorflow/tensorflow
What Will I Learn?
Here, today we come up with a new tutorial, in this tutorial you will learn Image Recognition using Tensorflow and Kivy. Real time image recognition, open the camera to capture the image and the App automatically detect the objects from the image.
- Tensorflow Image Recognition
- Tensorflow with Kivy
Requirements
- Programming Fundamentals
- Python Essentials
- Kivy Essentials
Difficulty
- Intermediate
Tutorial Contents
- Introduction
- Setting up the Environment
- Develop Image Recognition
Introduction
In this tutorial we are going to develop Image Recognition App, the will allow you to detect the objects from the image. For this we'll use Tensorflow in order to detect the objects in the image, we'll talk about it in just a moment. We'll also use Kivy (a python library) to the App's GUI, if you know about our Kivy tutorial series then you know about the Kivy, but if not then please check our Kivy tutorial series.
TensorFlow
TensorFlow is an open source library and develop by researchers and engineers from the Google Brain team within Google’s AI organization for high performance numerical computation, and supports machine learning and deep learning. For more info visit TensorFlow.
Google trained Inception-v3 for ImageNet large visual recognition in which models try to classify the image into 1000 classes. For complete description please visit TensorFlow ImageRecognition.
Setting up the Environment
Before we move to develop our Image Recognition App, first we have to set a working environment that will allow us to develop our app. For this first of all install the TensorFlow and then install the Kivy library on your machine, visit their sites in order to install. You also have to install some other python packages to run it properly on the machine, these packages are argparse and numpy.
Develop Image Recognition App
In order to develop an Image Recognition App, first of all create a file in your text editor (we are using PyCharm) and save it with a name main.py.
First of all we'll develop our App in Kivy, for this first import the Kivy packages, write the following code in you file.
```
import kivy
kivy.require('1.9.0')
from kivy.app import App
from kivy.lang import Builder
from kivy.uix.boxlayout import BoxLayout
from kivy.uix.label import Label
These are the packages we'll use in order to develop our app.

Next up we'll develop the App's GUI, for this write the following code.
Builder.load_string('''
:
orientation: 'vertical'
Button:
text: 'Capture'
size_hint_y: None
height: '48dp'
''')
class CaputeImage(BoxLayout):
pass
class ImageRecognition(App):
def build(self):
    return CaputeImage()
if name == "main":
imagerecognition = ImageRecognition()
imagerecognition.run()
Output:
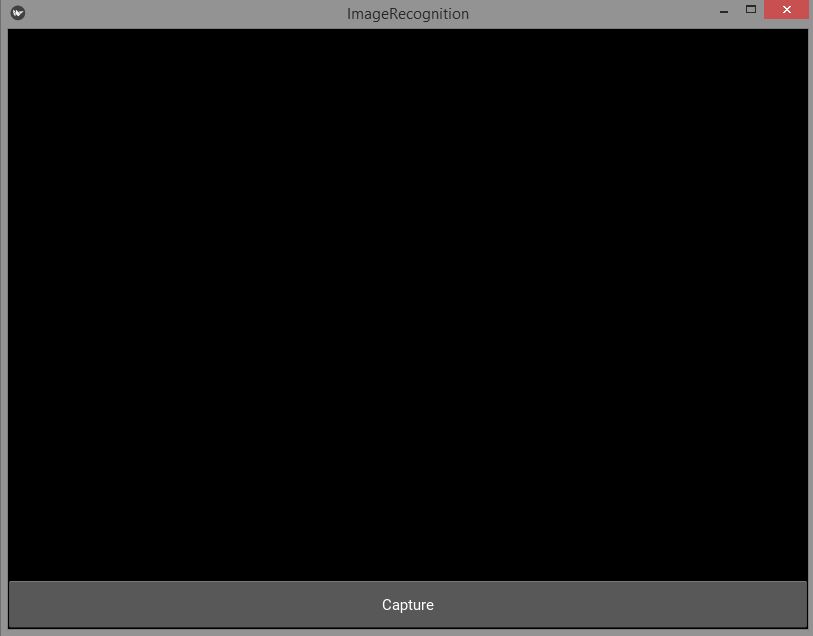
Now run the camera in the app in order to capture the images, for this write this code in the ```Builder.load_string ``` method.
Camera:
    id: camera
    resolution: (720, 480)
    play: True
Place this code above to the capture Button code, by default we set the camera ```play:True ```, this means whenever you launch the App camera will automatically starts.
Output:
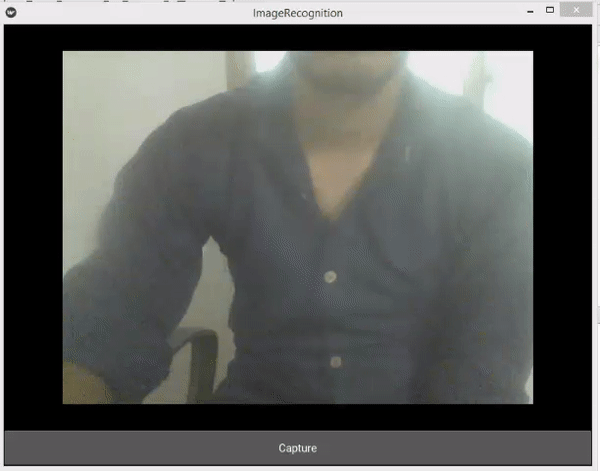
You can see our camera is working fine, Now we'll capture the image using camera. For this develop a method ```def capture(self): ``` within ``` CameraClick ``` class and write the following code in order to capture the image.
def capture(self):
    '''
    Function to capture the images and give them the names
    according to their captured time and date.
    '''

    camera = self.ids['camera']
    camera.export_to_png("test_images/IMG.png")
    print("Captured")
    self.ids['camera'].play = False
Also call the method whenever you click the capture button, set the this in the button properties,  ``` on_press: root.capture() ```

``` camera.export_to_png("image/IMG.png") ```  allow us to export the image into image folder and save it with name ```  IMG.png ```  . So, also make a folder with the name ```  image ```   in the working directory in order to save the images.

Now run the app and click over the capture button it will capture the image and export it to ``` image ``` folder.

Next up we'll move to our real work, detecting the objects from the image. For this first copy this code from [github](https://raw.githubusercontent.com/tensorflow/models/master/tutorials/image/imagenet/classify_image.py). Create a new file with name ```  imgrecog.py ```  and paste copied code in this file and save it.  And import this file in the ```  main.py ```  file for this write the code. ```   import imagrecog as ir ```

Now made some changes to this code, first of all cut the main method and past it in the ```  main.py ```   file within the ```  CaputeImage ``` class. and remove the _ from the parameter body and write the self. and change the code as

 ```
    def main(self):
        ir.maybe_download_and_extract()
        image = (ir.FLAGS.image_file if ir.FLAGS.image_file else
                 ir.os.path.join('image/', 'IMG.png'))
        ir.run_inference_on_image(image)
Now remove the if __name__ == '__main__': from imagerecog.py and remove indentation of the code within the if statement.
And lastly remove this line of cod tf.app.run(main=main, argv=[sys.argv[0]] + unparsed) from imagerecog.py file.
Now move toward main(self) method in the main.py file. And make a label to show the returning text from the imagerecog.py file. For this add the following code in the method.
self.add_widget(Label(text=string, text_size=(600, None), line_height=1.5))
Now move toward capture(self) method and call the main(self) method after capturing the image. Your code in the capture(self) method will be
    def capture(self):
        '''
        Function to capture the images and give them the names
        according to their captured time and date.
        '''

        camera = self.ids['camera']
        camera.export_to_png("test_images/IMG.png")
        print("Captured")
        self.ids['camera'].play = False
        self.clear_widgets()
        self.main()
At the last point open the imagerecog.py file and jump toward def run_inference_on_image(image): method and replace the for loop code with the following code in the method.
    string = ""
    top_k = predictions.argsort()[-FLAGS.num_top_predictions:][::-1]
    for node_id in top_k:
      human_string = node_lookup.id_to_string(node_id)
      score = predictions[node_id]
      string += '%s (score = %.5f)' % (human_string, score)
    return string
Here in my file it is the line no# 162 - 168
Now run the App, you will see whatever you capture in the image the App will detect it from the image.
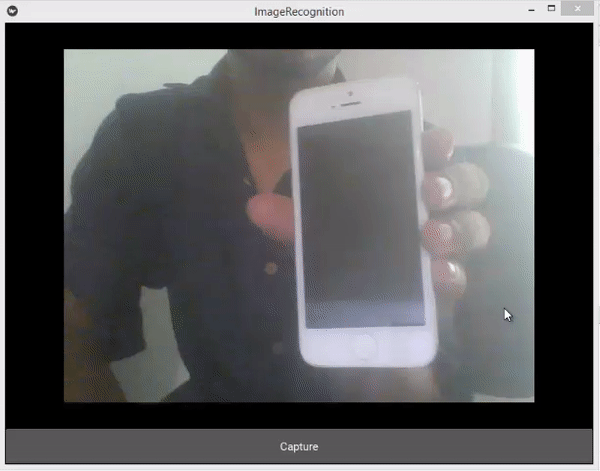
Output:
[IMAGE: https://cdn.steemitimages.com/DQmettuJLWEF1sKVuACq8RKsDx79tdZXdku7CN1GQERiFni/ImageRecognition-3.gif]
You can see in the above image we capture the cellphone image and it detects all the possible results in the image.
Proof of Work Done
https://github.com/faad1/tensorflow-image-recognition