Landscape photography is one of the genres that I enjoy the most. I started photographing landscapes shortly after I was introduced to photography. In fact, the only highlights in my early years of photography were with landscapes.
[IMAGE: https://cdn.steemitimages.com/DQmRe7Pj6NsBg3W9uCBNDL3n8WCS7Un3c5z88aJqkTyWwLB/_JVW0498-XGA.jpg]
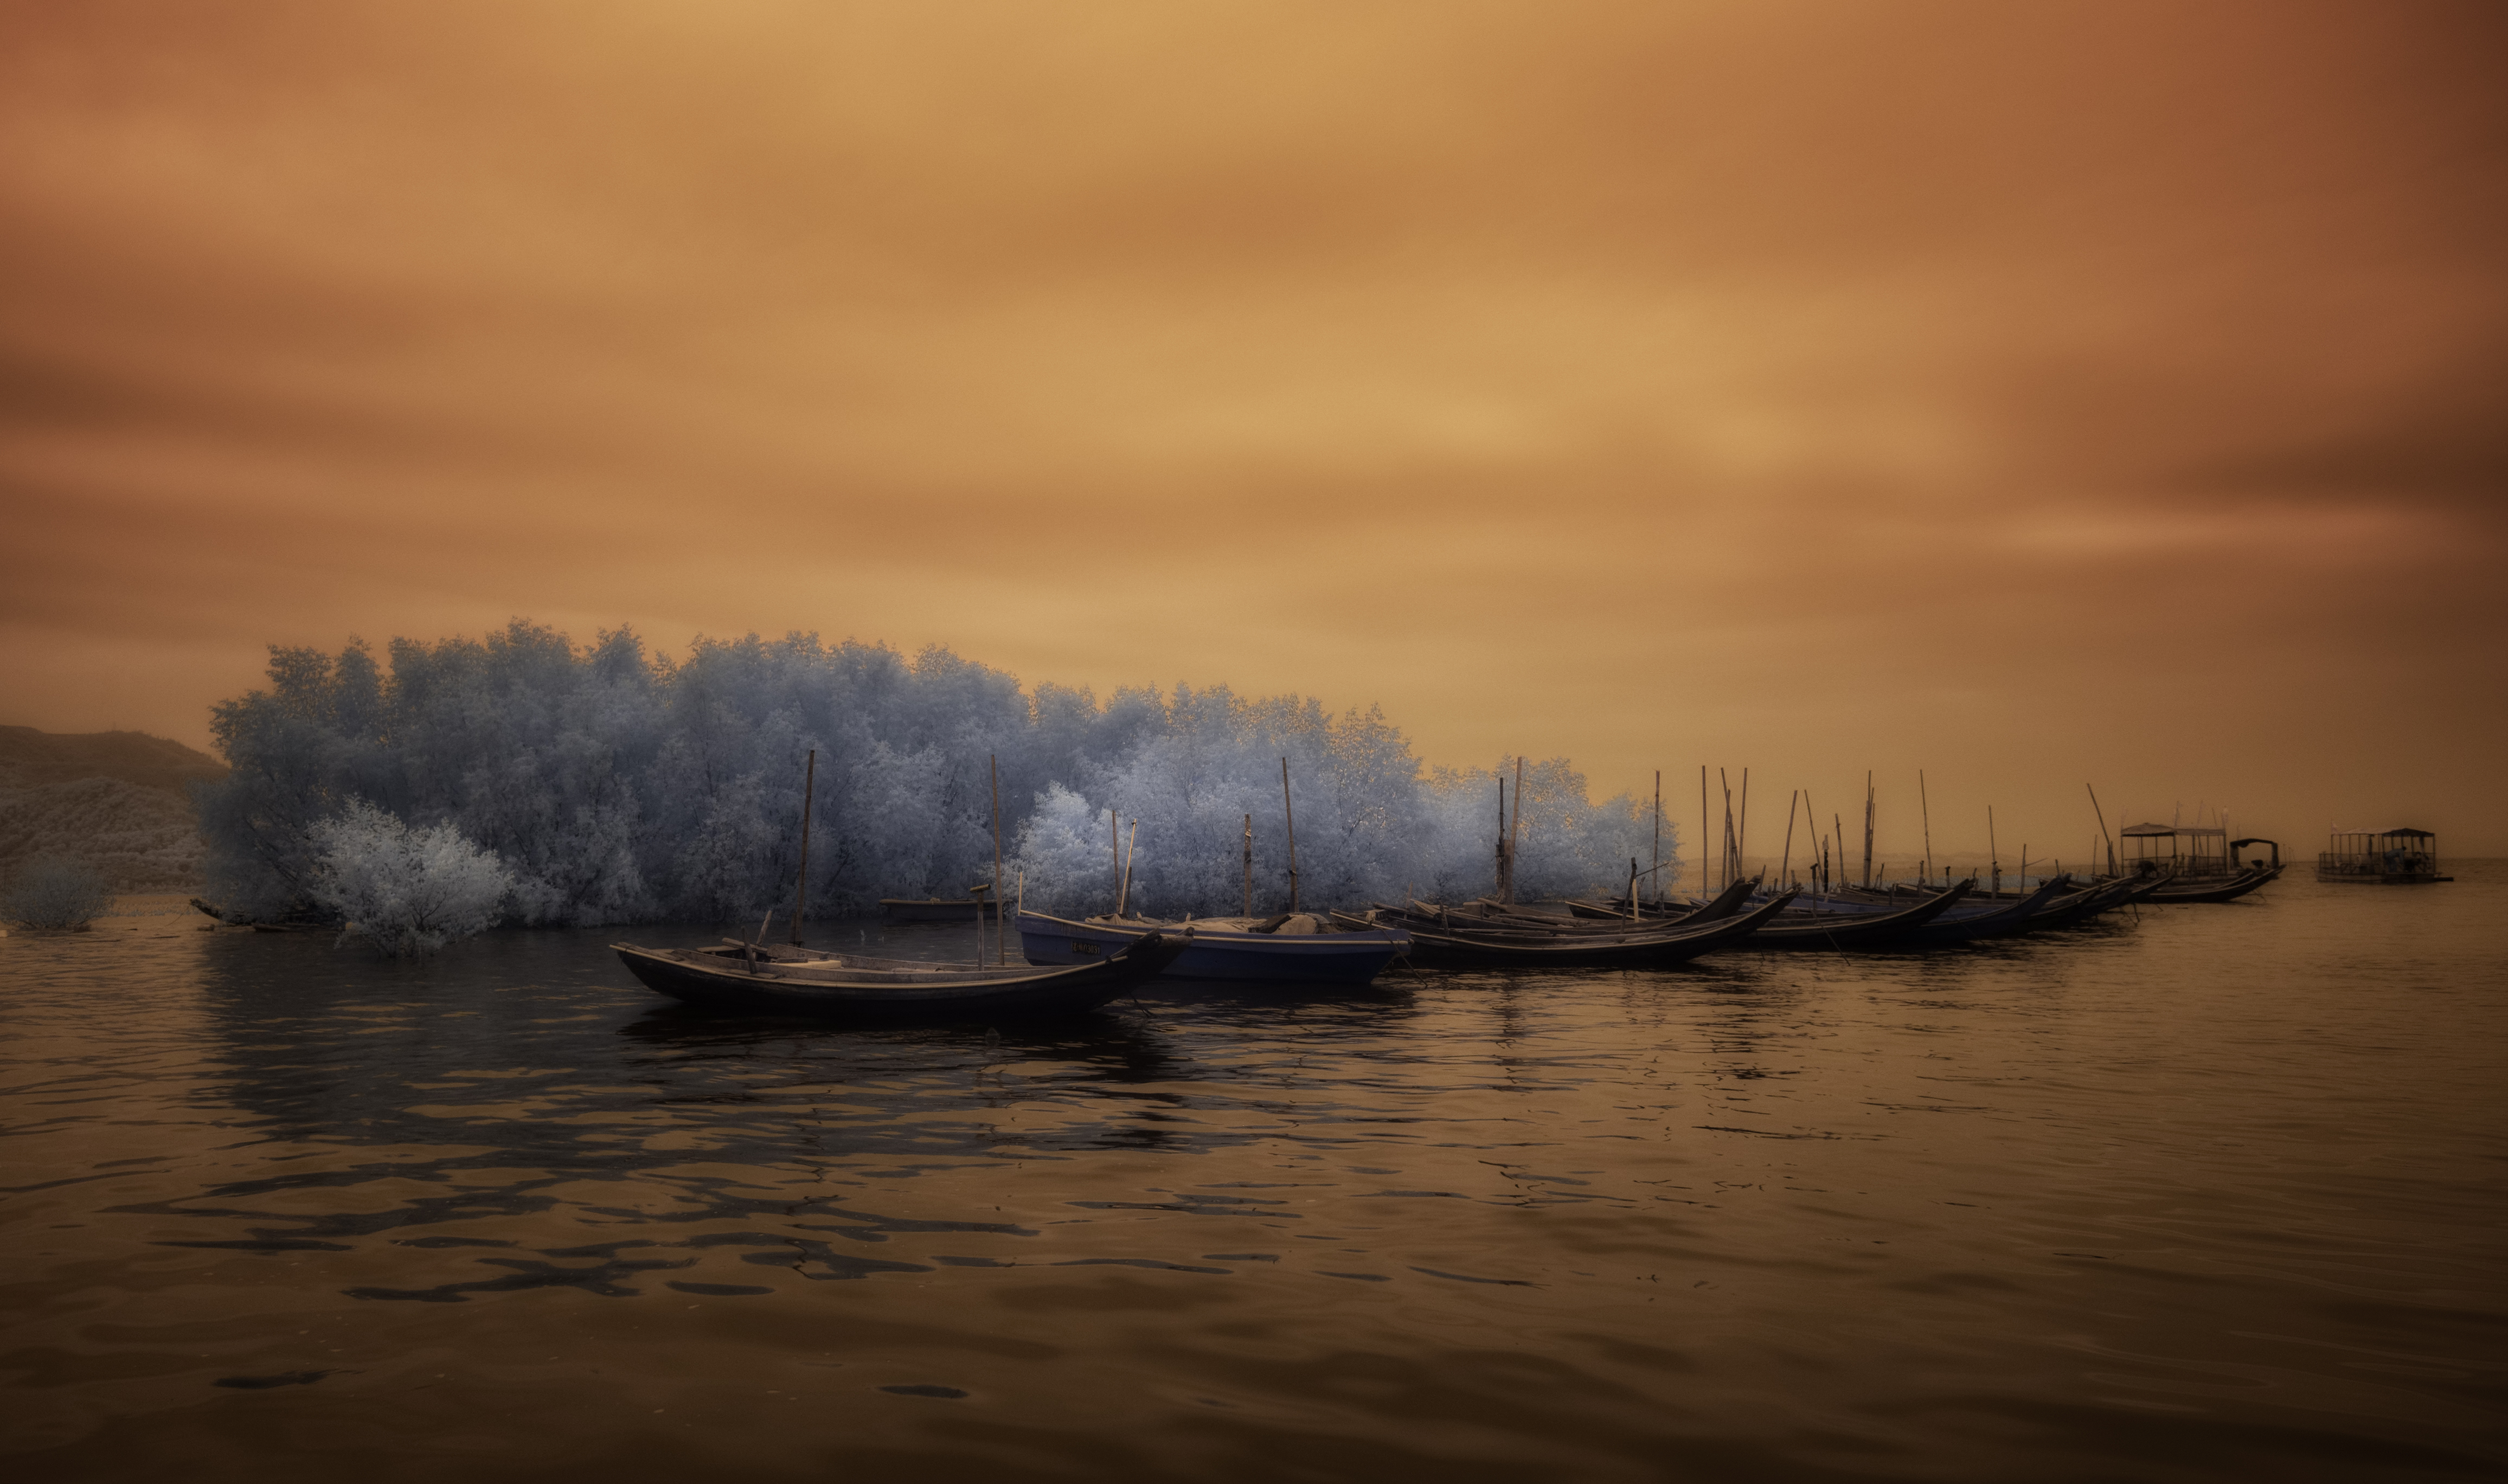
High Tide
From early on I started manipulating landscapes - but those days we did not call it manipulating, we rather called it "develop", and it entailed working in the darkroom with techniques such as dodging and burning, adding a slight vignette to a photo or even in some cases adding a gell or cloth to the lens to soften the final look of the photo - all to ensure that it will draw your attention to the important elements in the landscape and that it will envoke the mood I had in mind.
Nothing has changed.
I am still doing the same, I dodge and burn, I sometimes add a vignette and I even sometimes add a gaussian blur to a photo to create the mood I had in mind.
Although I see myself as reasonable proficient in Photoshop, I am in fact quite conservative in the techniques I use when "developing" a landscape - it is mostly the same techniques I used in the traditional darkroom.
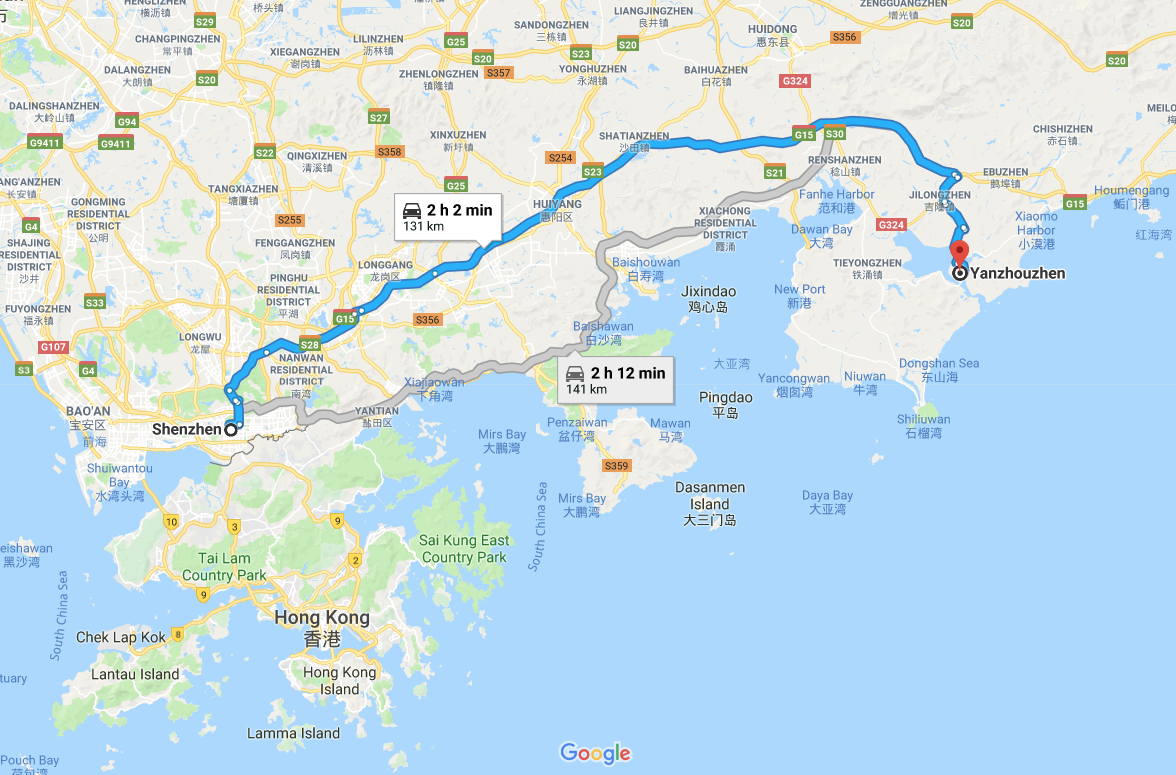
Let me take you through the steps I used to create this photo called "High Tide". I photographed this photo at Yanzhuodao (盐洲岛) in the south of China about 2 hours drive east of Shenzhen while presenting a landscape workshop on long exposure photography.
[IMAGE: https://cdn.steemitimages.com/DQmcY3Z1bXFH7gp35wBh4HfPBQpQATp1oeNwj696NBfSqLN/yanzhoudao.png]
This photograph was taken in infrared using a custom white balance that rendered the sky as an orange/amber colour.
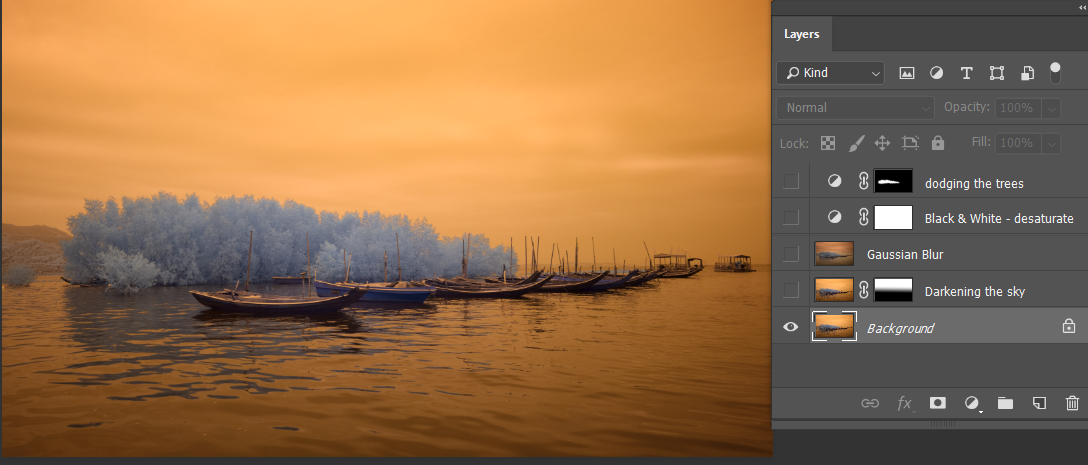
This is the photo before any photoshop development.
[IMAGE: https://cdn.steemitimages.com/DQmVYBWNaZegSSW3LYZeHX3R1AhmmhXPWu5sMowsZ3yfnoy/Original.png]
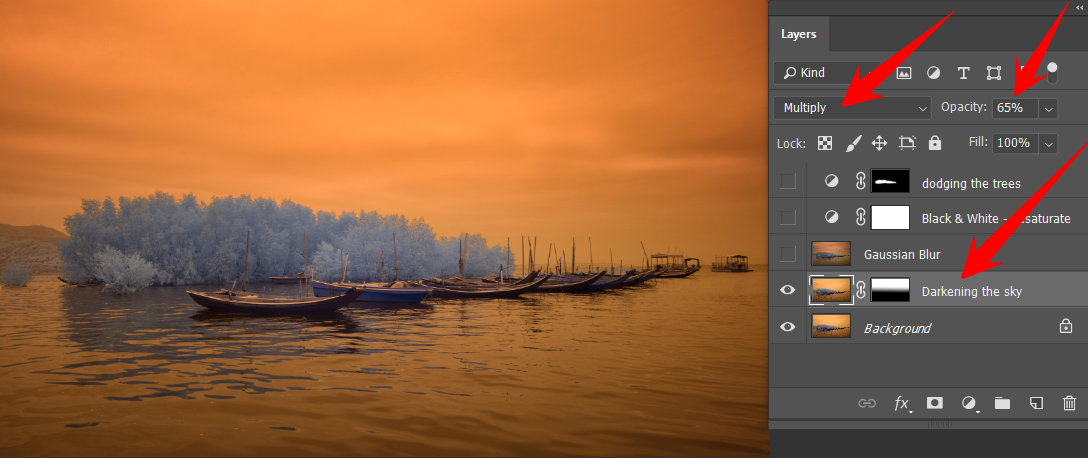
I started by darkening the sky. For this, I duplicated the original layer, add a gradient mask to ensure only the sky is changed and then changed the blending mode to Multiply and, because the effect was a bit too much for my taste, I changed this layer's opacity to 65%.
[IMAGE: https://cdn.steemitimages.com/DQmdMuNKW9fUuT2e9uRRzi8QHkr7UZND95tFwPcPDc5VKCa/Step1.%20Darken%20the%20sky.png]
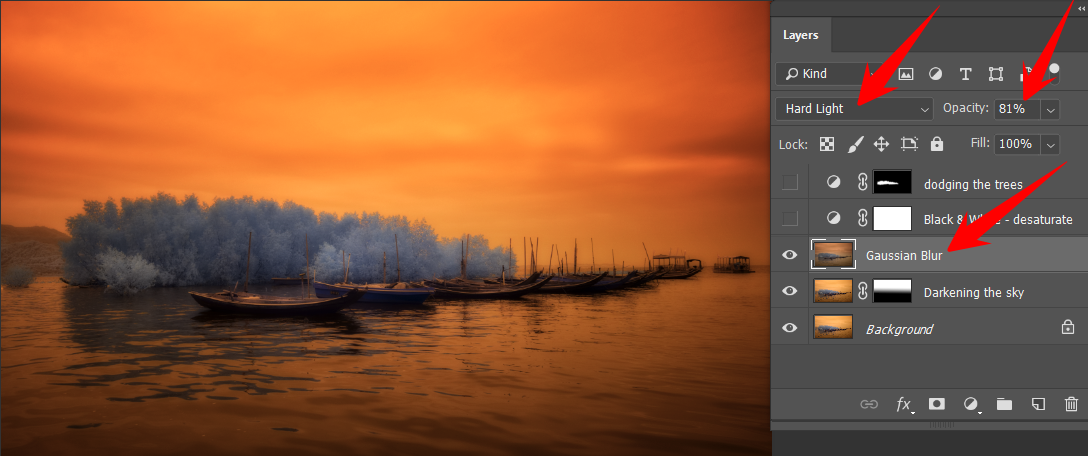
Like with most of my photos, it develops as I go along in photoshop.
In this case, I liked what I saw but I thought that a softer look would emphasise and laid-back mood of that afternoon better. I, therefore, decided to merge the two layers into a new layer and add a gaussian blur to the layer to soften it. I wanted to accentuate the lines in the photo while keeping the softness of the blur and therefore changed its blending mode to hard light. I also brought back the opacity of this layer slightly as the effect was a bit too much.
[IMAGE: https://cdn.steemitimages.com/DQmeK113JCD7XY533DjfnLD8rE8J5qvFuK9JeZRJBznGerF/Step2.%20Add%20a%20glow.png]
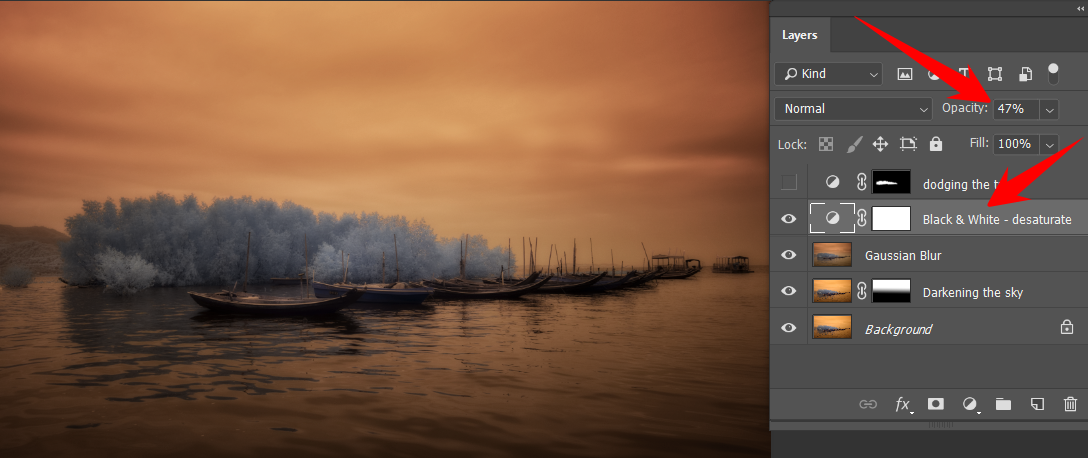
Although I liked the softness of the photo, especially the slight glow around the high contrast areas, I did not like the oversaturation that was introduced by the hard light blending mode. I decided to use my old trick of adding a black & white layer to the photo to bring down the saturation. I usually do not change the default values of the black & white layer, I only change its opacity to be in the region of 50%.
[IMAGE: https://cdn.steemitimages.com/DQmYMyuwyfDz4k5gbqypUMGV986jCyYNUiUwNyrH6gUU5iu/Step3.%20Desaturate.png]
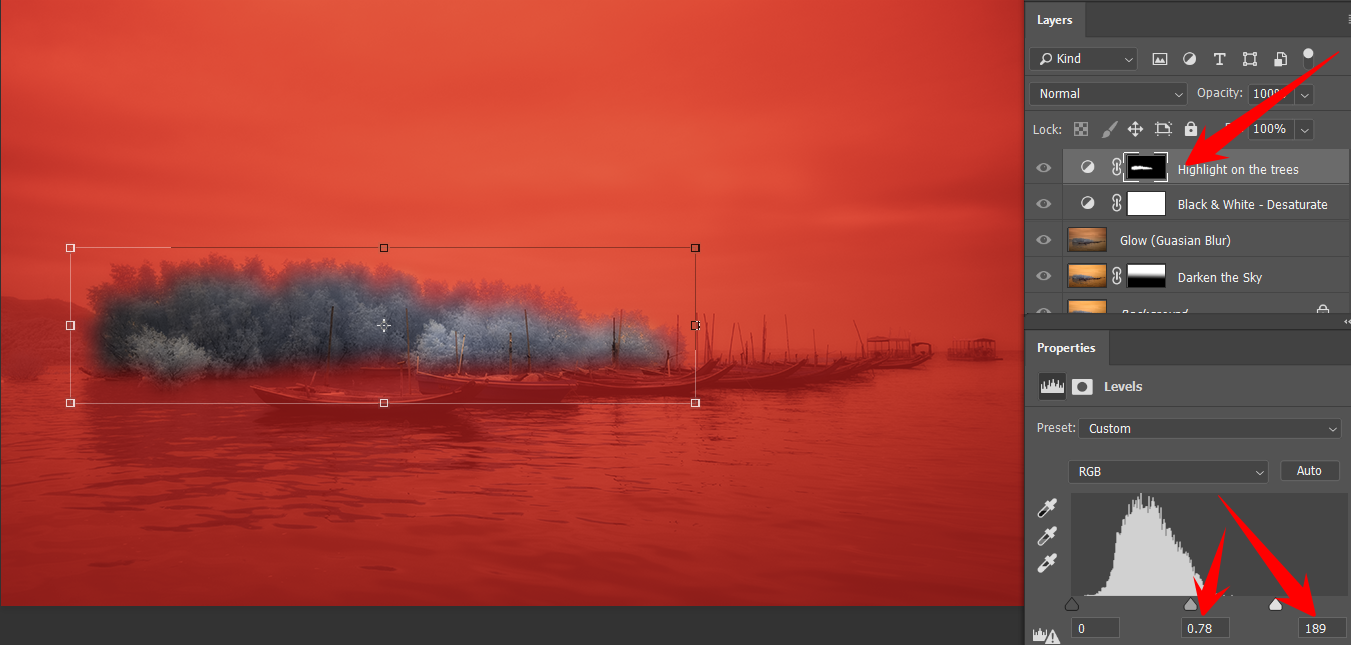
At this stage, I was really happy with the photo, but I thought that by dodging the trees a bit I could introduce them as a prominent feature that would aid in keeping your interest in the photo.
For this, I used the lasso tool to roughly select the trees and after feathering the selection I added a levels adjustment layer and change the white point and the contrast from the bright side of the histogram to add a highlight to the trees.
This is my entry for this week's #landscapephotography challenge created by @juliank.
[IMAGE: https://cdn.steemitimages.com/DQmRe7Pj6NsBg3W9uCBNDL3n8WCS7Un3c5z88aJqkTyWwLB/_JVW0498-XGA.jpg]
Hope you like it.