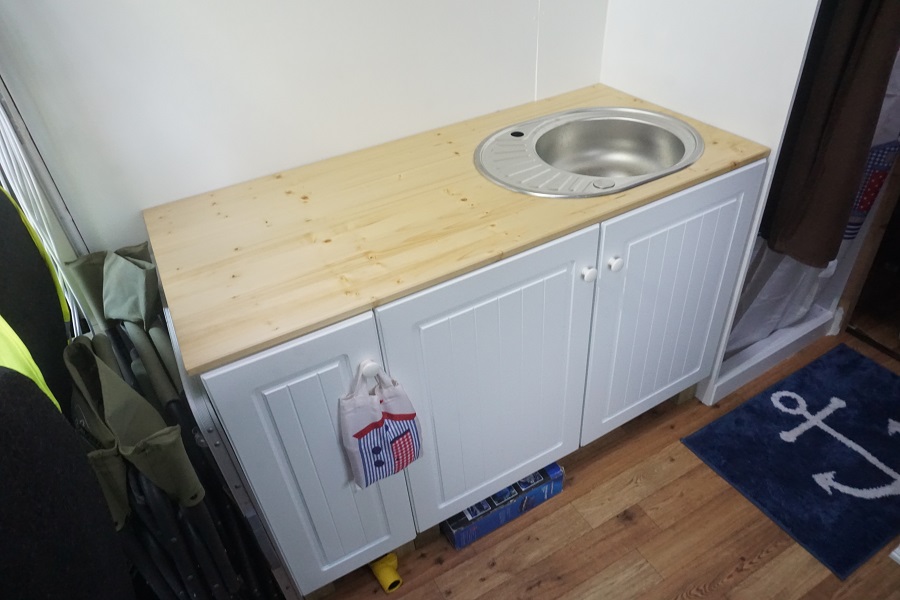
Reasons for my absence in Posts will become apparent below. My van conversion has progressed in giant leaps as I have spent quite a bit of planning, consideration and time putting some bulk into the build. This is PICTURE heavy, so I'll let most of the pictures do the talking.[IMAGE: https://cdn.steemitimages.com/DQmYnKFgxVbzeuvvaJf8B2aEZjWeBztfBZC5Jr682cGvbAq/Functional%20Kitchen.JPG]The current stage of things - Kitchen Units in, sink installed and working (less tap/faucet), all drainage holes done and a functional shower room.
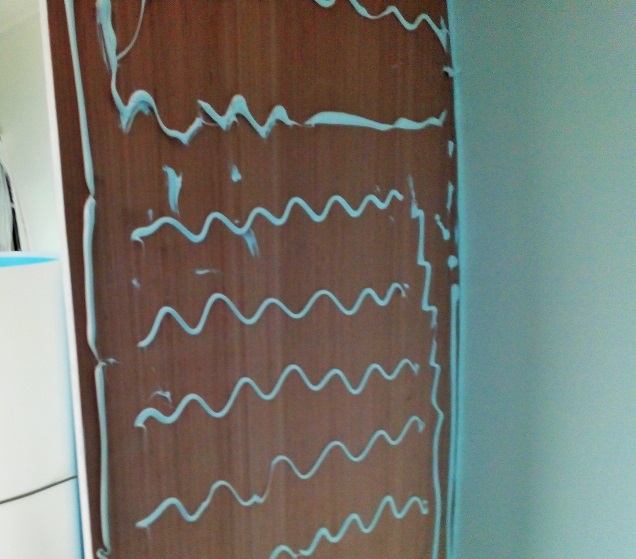
Below = just about to glue the hygienic PVC cladding for the shower cubicle. 'You can never have enough glue!'[IMAGE: https://cdn.steemitimages.com/DQmRRKdk7Qbf5ASigGsQcVqHaRmutv6Qm9WRfWFRR4wpYBU/Installing%20pvc%20wall%20cladding.jpg]
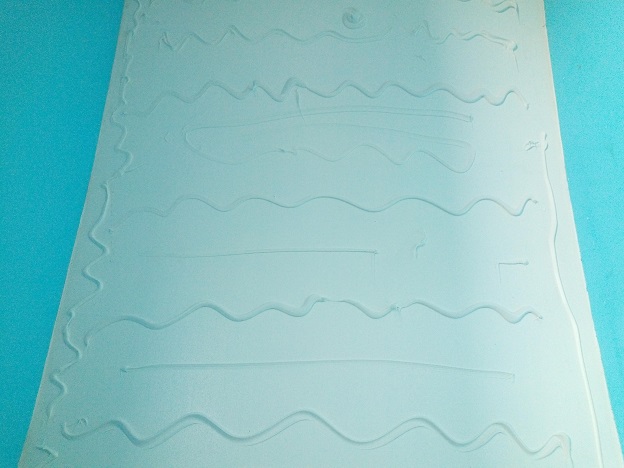
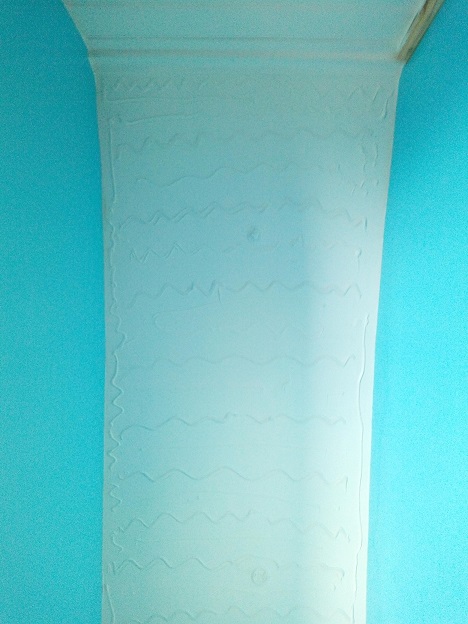
PVC shower walls installed and sealed - Blue plastic film about to be peeled off.[IMAGE: https://cdn.steemitimages.com/DQmcon2DYEsJ5XaKKnGMpkd7PRzdCKUi294oU53Tcbimu5s/Glueing%20the%20Shower%20Wall%20cladding.jpg]The curved walls were frustratingly challenging.
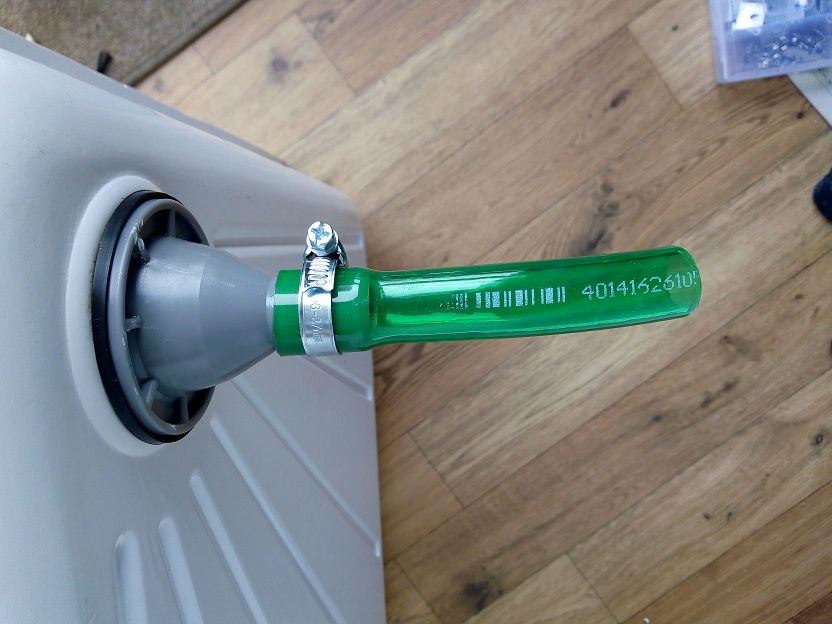
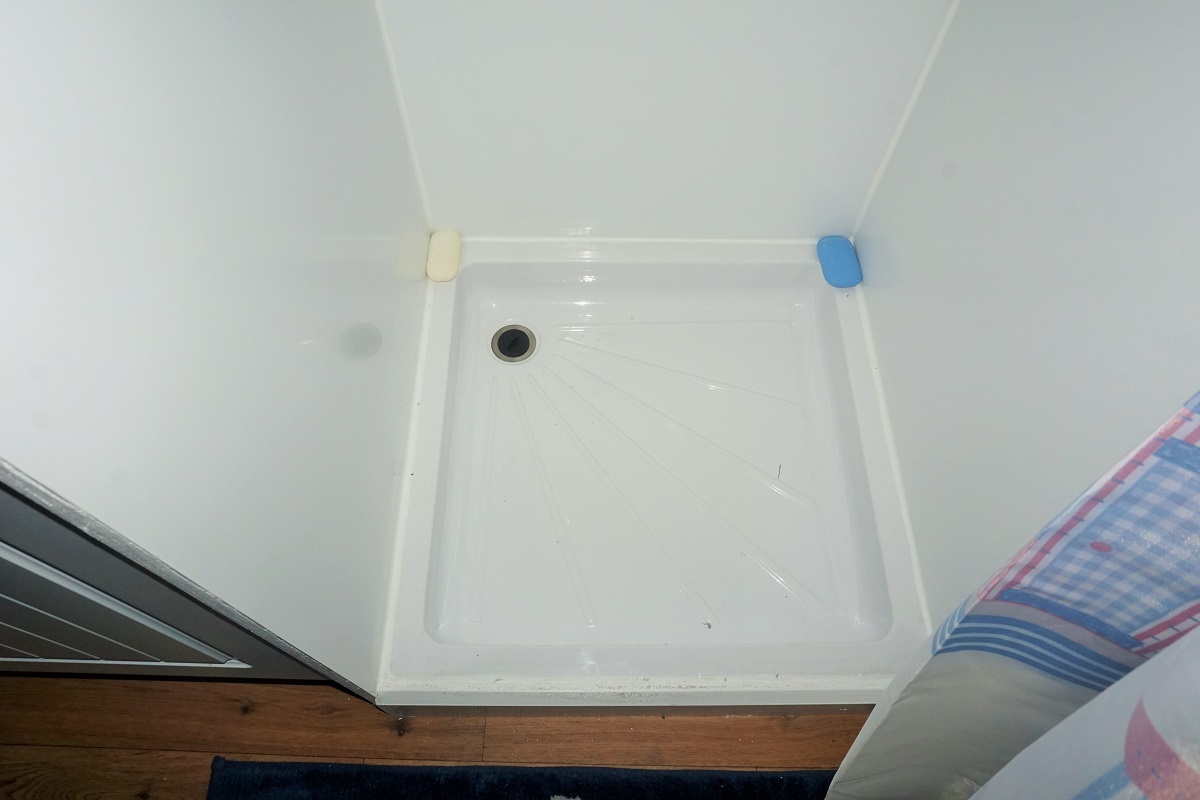
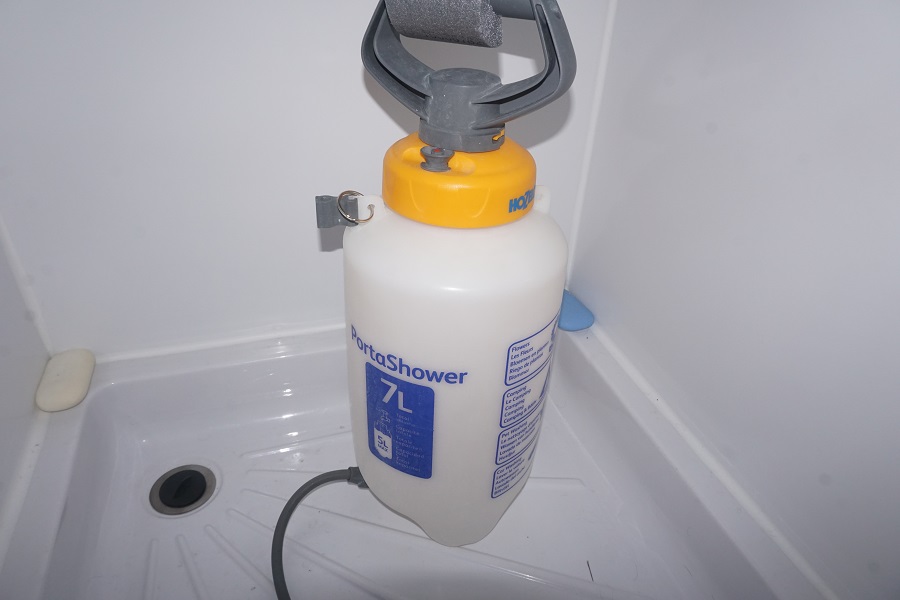
[IMAGE: https://cdn.steemitimages.com/DQmZJBmhiCsTS47CpDYDXnmGvZ5ockc2xWWhZZY7w2shNvz/Finalising%20the%20shower%20cubicle%20walls.jpg]Bottom of the shower tray & the drain tube = SIMPLE![IMAGE: https://cdn.steemitimages.com/DQmWhYG3snY6gxRnYUU7nuYnrHGTYQ8VJg5fJXv8NQJAP3R/Shower%20tray%20drainage.jpg]All in and sealed.[IMAGE: https://cdn.steemitimages.com/DQmSmu7bThvV5AEtRjTzGxfvA1mVqMDnQeGvXHpbS9Lcv3V/Shower%20Tray%20Installed.JPG]Before all the plumbing is finalised, I'll use my back-up shower.[IMAGE: https://cdn.steemitimages.com/DQmTtoAU3Sv22iVmsvSiQEhM3jP419KUgsPd5ziuy69PiTw/Temporary%20Shower%20Unit.JPG]
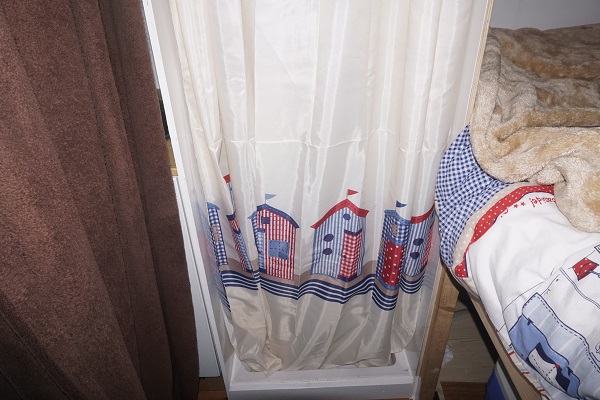
Shower curtain up![IMAGE: https://cdn.steemitimages.com/DQmWoAev6kQeU6TqQXVBQ1E8tBRmNfs8pJsi9oPTRjSY5CS/Shower%20Curtain%20In.JPG]
The Vanity Unit
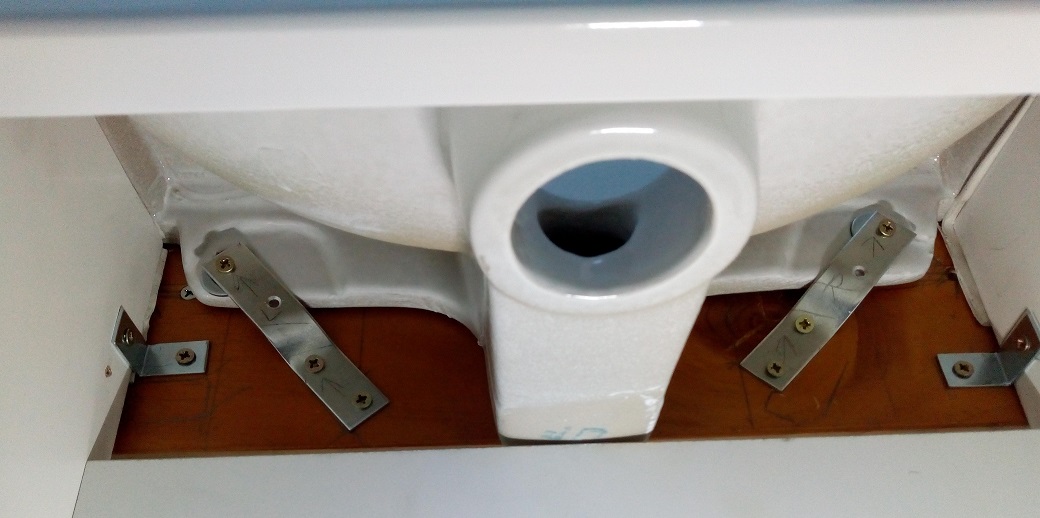
This is a standard vanity unit and sink. Made of porcelain, it is quite heavy and so required a robust installation approach, hence I made some custom brackets.[IMAGE: https://cdn.steemitimages.com/DQmYuBAH6bmTyQnYT4QCFQct9KGmy8jYQFDeq91PEhkgN9i/Custom%20made%20fixings.jpg]
Some workings out![IMAGE: https://cdn.steemitimages.com/DQma3E3AhdZangwcRLZVQqi1nh3CSKYm39cgA5ojTxBuRre/Workings%20out%20on%20the%20Vanity%20Unit%20Installation.jpg]
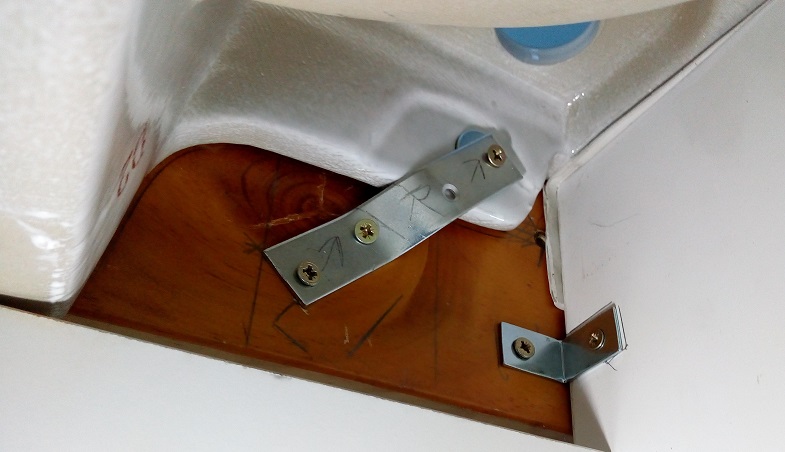
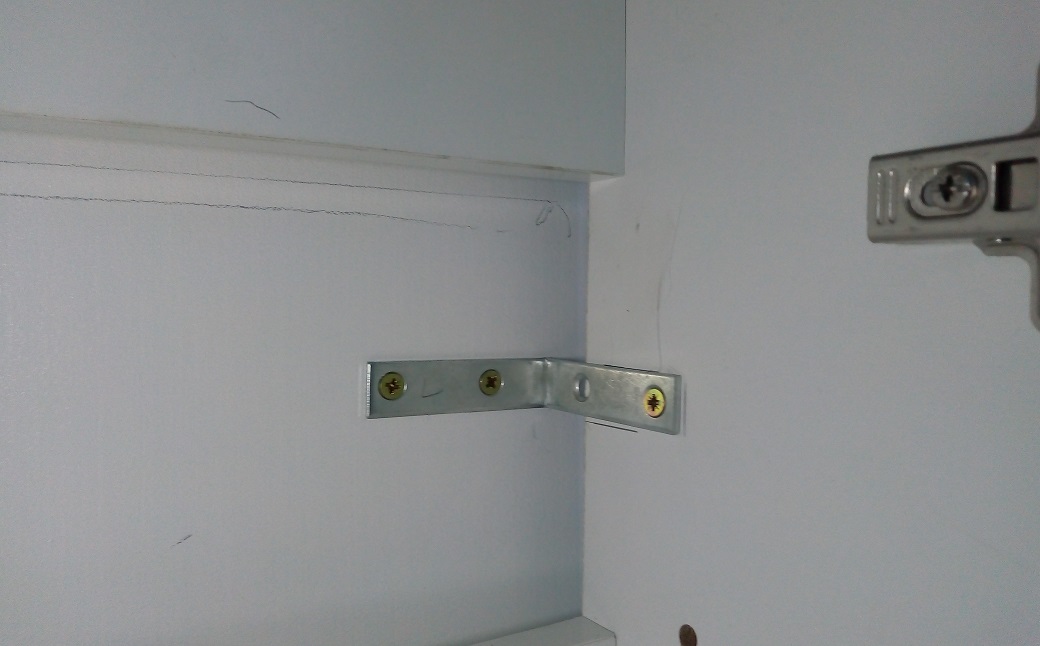
In a moving and vibrating vehicle, everything requires secure fixings to the wall.[IMAGE: https://cdn.steemitimages.com/DQmXzXZNetQwYKYNDZHc5Ybzf9ZherE84atFfb1MUGLaWWr/Vanity%20Unit%20Sink%20Installation.jpg]
No exceptions.[IMAGE: https://cdn.steemitimages.com/DQmd1dcJqi3SF1SYSufHmivFeKhQc5B6FjdMqJCND6hB6U8/Securing%20the%20Vanity%20unit%20to%20the%20wall.jpg]
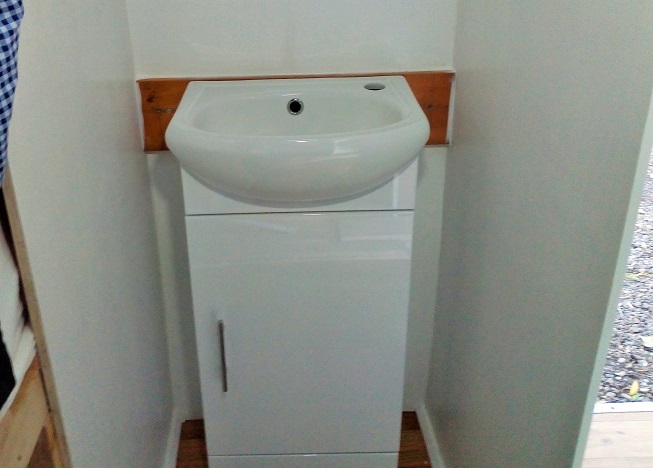
DONE![IMAGE: https://cdn.steemitimages.com/DQmQG39uLbUiPRGVnNSwB3E4J5o1RwjgJGoFD1BpjktwwNZ/Vanity%20Unit%20In.JPG]The dark strip of wood behind the sink strengthens the security/distribution of weight in the installation (The walls are only 6mm plywood).[IMAGE: https://cdn.steemitimages.com/DQmNe8daJHnNEZu7u75Q6eaT5dhCP2F8NCCg9HNPc1S3qFj/Vanity%20Unit%20Installed.jpg]
The Kitchen Units & Sink
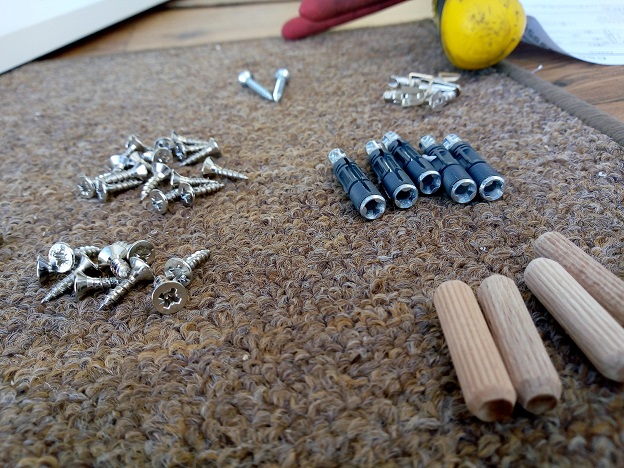
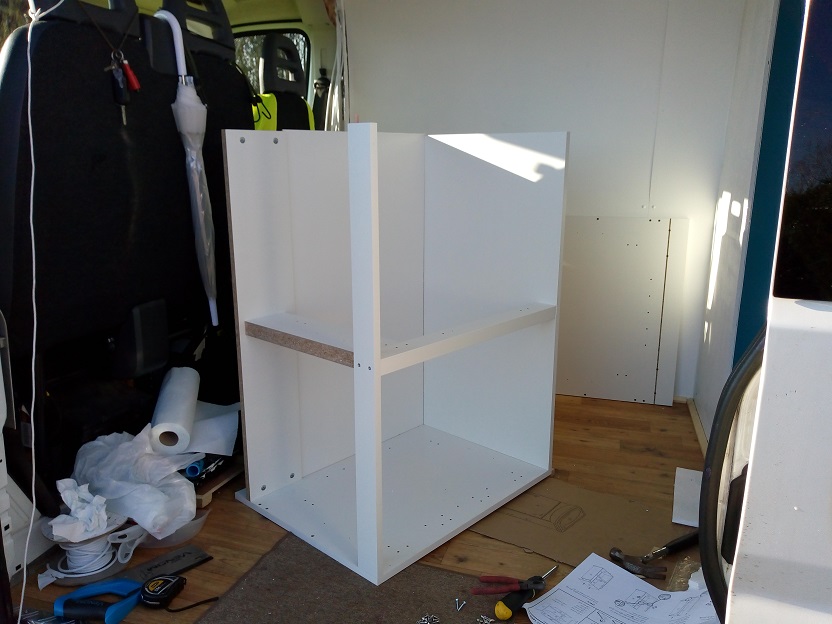
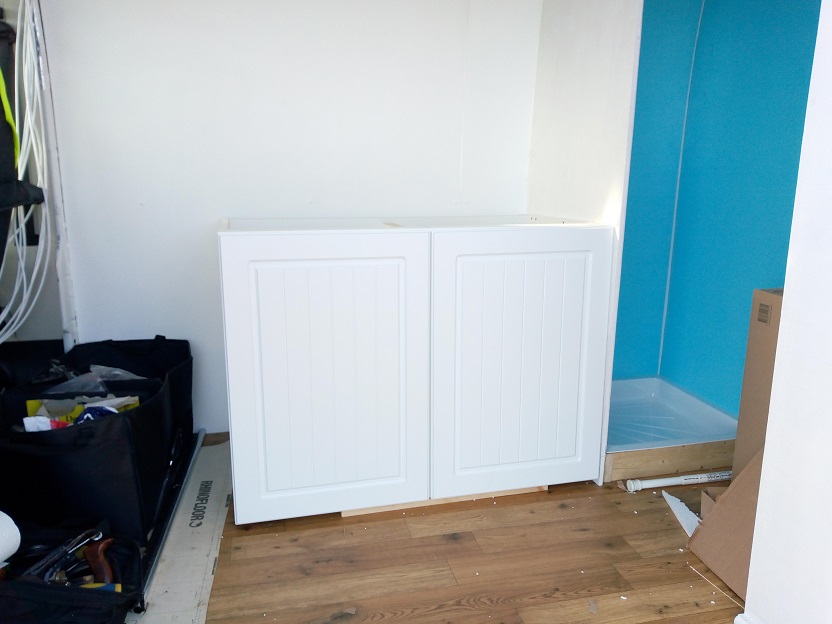
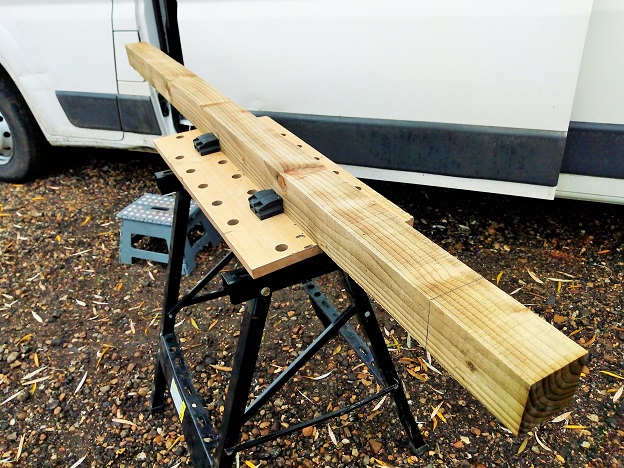
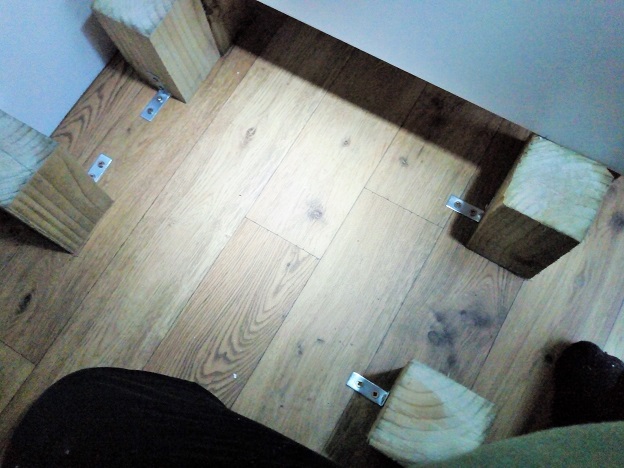
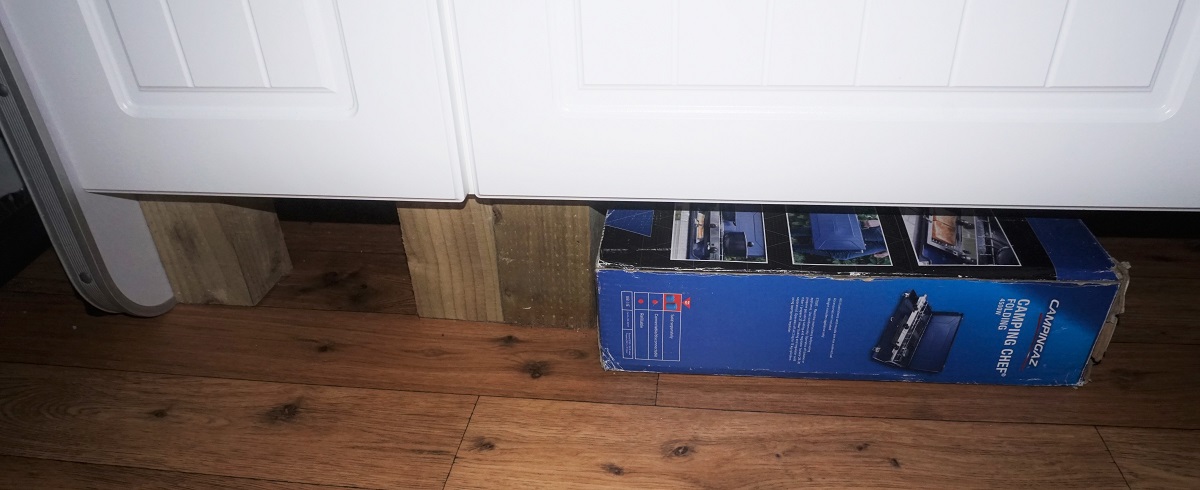
A 1ft cupboard and 3ft sink unit - A variety of supplied fixings, dowels and screws.[IMAGE: https://cdn.steemitimages.com/DQma2MmXDjmaCBL6ECHyzPYyw4cgsmr6EhHXtcEXVnQmTpC/Screws%20and%20Fixings%20supplied.jpg]Now this was pretty easy! It came with instructions.[IMAGE: https://cdn.steemitimages.com/DQmV3w6E5Yd9SSSuf782i9yrrrUFLLB9tp9czBiDfQkvsh9/Building%20the%20Kitchen%20Unit.jpg]Taking shape nicely.[IMAGE: https://cdn.steemitimages.com/DQmRoyeFg8iKNULt3oRkPHsVjLUXsCkuzyXXnipi32YMCvE/Kitchen%20Unit%20nearly%20complete.jpg]Once built, I discovered that the units were going to be too low and would result in back-ache when bending over at the cooker/sink, so decided to raise them to a comfortable height. It also allowed me to maintain some under-unit storage and to be able to secure the units to the floor and walls. First though, make some raising blocks out of this fence post.[IMAGE: https://cdn.steemitimages.com/DQmb7XgSSgUu4uoVfpaRGQuESjLKJL4Mnuah2LiZExS5Yfn/Wooden%20Support%20Post%20to%20elevate%20the%20Kitchen%20Unit.jpg]Uniformal in size and screwed to the floor.[IMAGE: https://cdn.steemitimages.com/DQmYTHTrF5JZDxxs33DGKzFrRzkDgEfQy4FDCBH9NkFcrRG/Support%20Posts%20cut%20and%20in%20place.jpg]Cabinets then screwed to the blocks. My temporary Cooker stows nicely underneath.[IMAGE: https://cdn.steemitimages.com/DQmWaVK8fFYCT1ADc9E6hUC89y1SpPm8zck1QEoYMTheAHy/Kitchen%20Raised%20and%20secured.JPG]
The Kitchen Work Surface & Sink
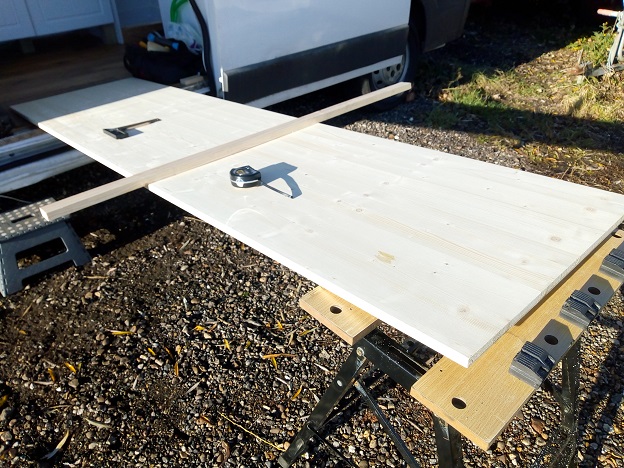
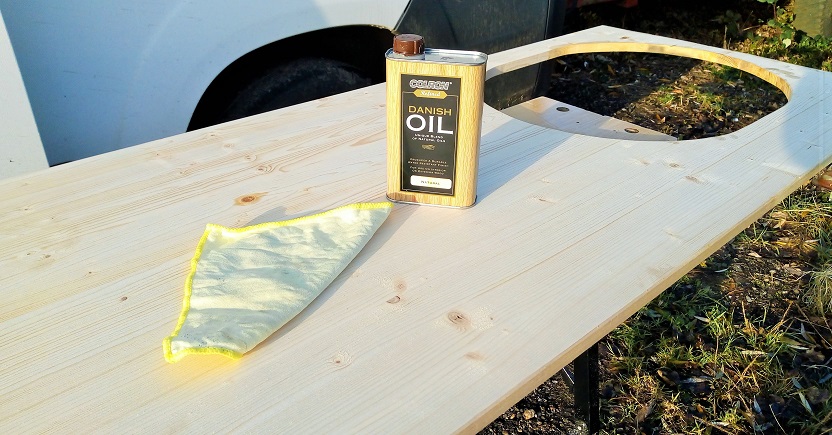
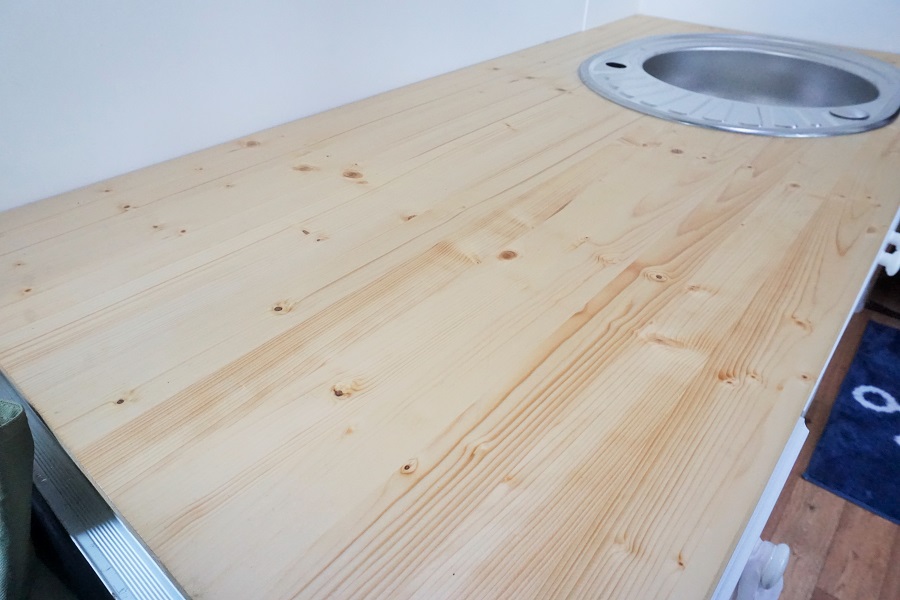
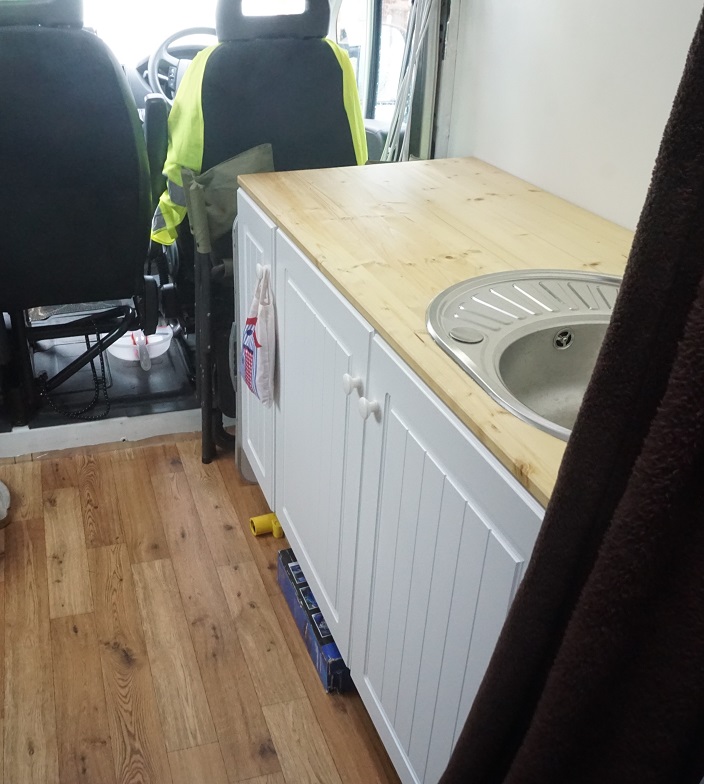
I used a long and flat piece of 12mm wood (shop bought) as it is lightweight and easy to work with.[IMAGE: https://cdn.steemitimages.com/DQmXoMMXGnJwowFKQz98md1KhV3EZFj4nc5BQMCwDNRMBWK/Kitchen%20Work%20Surface.jpg]Cut, seasoned and preserved with some fine oil.[IMAGE: https://cdn.steemitimages.com/DQmaafnKCrGjhRygzziycZPXUfQQbVcxFoKWUhHTM1MFYj4/Sink%20Hole%20Cut.jpg]Some fine looking grain patterns. Just need a tap/faucet.[IMAGE: https://cdn.steemitimages.com/DQmXTUErSQ5pEpK7cGekDj93vPRN57vqxXDRp5JbqKn3oGE/Kitchen%20Worktop%20Installed.JPG]All secured and in place - Ready for a Trip![IMAGE: https://cdn.steemitimages.com/DQmdJzcDwTTneoSBT5io4MJ9dEi3QxEqPjydnrNKk22nkPy/Kitchen%20Units%20and%20Sink%20Installed.JPG]
Thanks for dropping by folks... Questions, queries and comments below please (I am no DIY expert lol)!
[IMAGE: https://cdn.steemitimages.com/DQmV2x41635u56moimk7W3BH6XYNn9puU7VVw7q9tzYxnrQ/PREPPER%20VETERANs%20VAN.jpg]
Van-build stages:
My Latest Brainwave & Project
Assessing The Task
The Strip Out
Floor Preparation & Rust Treatment
Hole Plugging & Lock mending
Finalising The Floor Foundations
The Insulation Begins
Insulating The Floor
Wall Insulation
The Bed & Test Run
Replacing The Windscreen
Building The Bathroom Walls