[IMAGE: https://cdn.steemitimages.com/DQmS4ho2iWke6Uc4wmNdSTD2GCtYJZFb7rRzMD2LLV49Dqs/ionic.jpg]
image source
Repository: Ionic Github Repository
Software Requirements:
Visual Studio Code(Or any preferred code editor),
npm, ionic.
What you will learn:
In this tutorial you would learn about how to manage your ionic app on whatever platform you choose to target covering these major concepts
- How to update settings whenever changed
- How to Sync setting across app using lifecycle events
- How to Sync a modify template elements using
@viewChildandRenderer
Tutorial
Today, I would be coming back from my 3 week break with a new tutorial about how you could set up settings for your application.
In this tutorial we would be building a complete application from scratch.
Almost all applications give users options to change some parts of the application either embedded in the template or even part of the logic of the application. I did some research and this isn't properly taught on any free courses so i chose to show my reader how you could set up settings for your application using lifecycle events and storage memory for a local app. And you could also use your backend to sync settings for a user that may be using his account over multiple devices.
Lets get started...
Update Settings on Change
Start up a new ionic project with a tabs template like this
ionic start newProject tabs
Agree to all the prompts and then proceed to open your preferred editor in the folder that ionic just created.
Before we jump into this i would like to show you the life cycle events that we will be using for this tutorial. If you haven't been following my series
Lifecycle events are functions that are triggered automatically when a user is switching between views.
For this tutorial we would be using
-ionViewWillEnter: Triggered before a view Enters
-ionViewDidLoad: Triggered the first time the view loads.
For the purpose of this tutorial we would have to create some logic which we would like the user to be allowed to change. We would be making the user choose what content he would see on his homepage from the settings page.
Our app comes with the Home, About and Contact Tab. For this tutorial, we would be converting the About Tab to the settings tab.
Head over to the tabs.html document under the tabs folder and make this relevant changes.
//Here i changed the icon for the tab and the name shown
You can now head to your home page and begin creating the template for a simple note taking app.
This would be the content of the homepage.
    My Note Taking App


      Add a new note


          Type Here


      {{ item }}
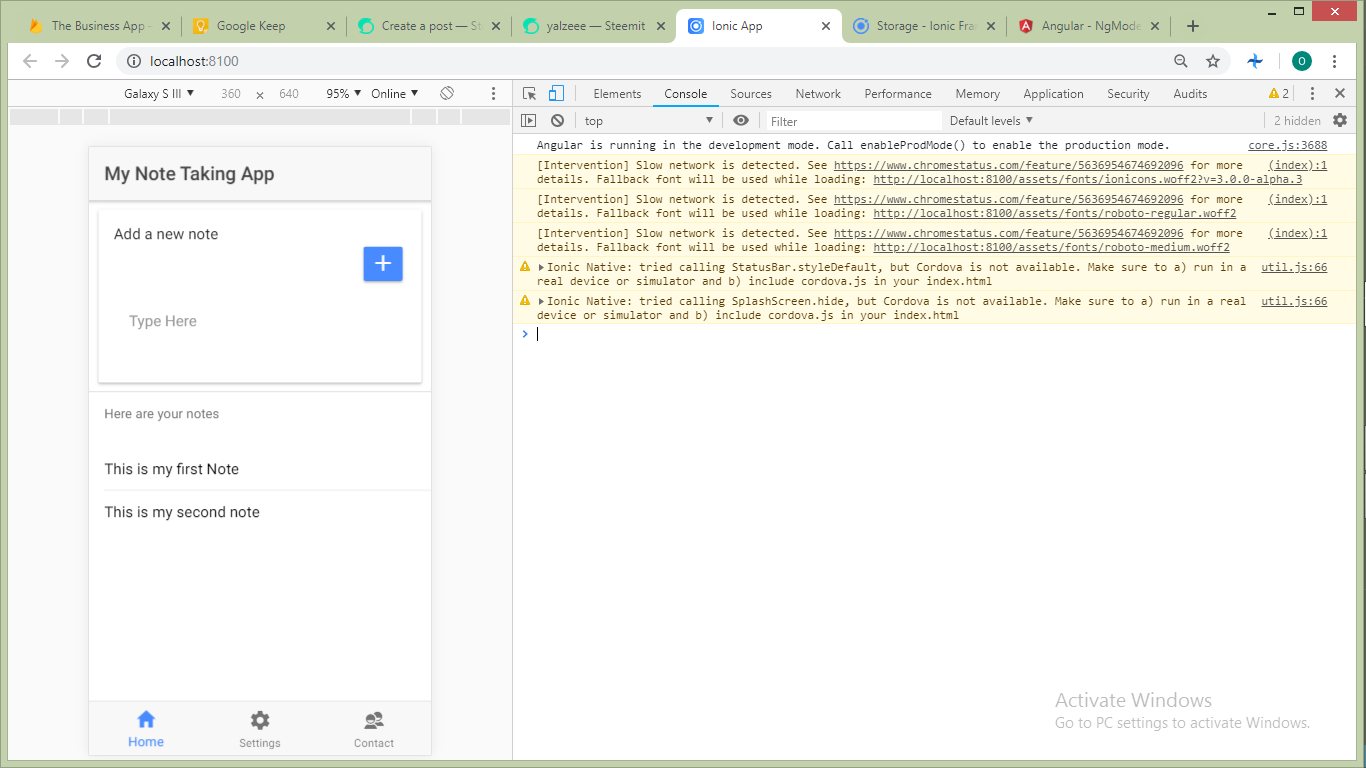
And you can then run ionic s which would run in our browser to show the template. As we can see for this tutorial we would be using a simple note taking application.
[IMAGE: https://cdn.steemitimages.com/DQmfSSmPxPUgtzWpsTLyyR1z8YfYvC8ZwVTwA1MG5i2hRu1/Screenshot%20(117).png]
.png)
Tip: You can easily open the chrome console using ctrl + J
Note: To get the storage to work you would need to update your app.module.ts file to know which storage to use like this.
import { IonicStorageModule } from '@ionic/storage';

@NgModule({
  declarations: [
    // ...
  ],
  imports: [
    BrowserModule,
    IonicModule.forRoot(MyApp),
    IonicStorageModule.forRoot()
  ],
  bootstrap: [IonicApp],
  entryComponents: [
    // ...
  ],
  providers: [
    // ...
  ]
})
export class AppModule {}
After that head to your home.ts file and add the logic that helps you collect these notes and store them on the devices storage.
import { Component } from '@angular/core';
import { NavController, AlertController, ActionSheetController,Platform } from 'ionic-angular';
import { Storage } from '@ionic/storage';

@Component({
  selector: 'page-home',
  templateUrl: 'home.html'
})
export class HomePage {
  note: string;
  notes = [];
  constructor(public storage: Storage , public actionSheetCtrl: ActionSheetController, public alertCtrl: AlertController, public navCtrl: NavController) {

  }
  ionViewDidLoad(){
    this.storage.get('notes').then(notes=>{
      if(notes){
      this.notes = notes;
    }
    })
  }
  addNote(){
    console.log(this.note);
    this.notes.push(this.note);
    this.note = '';
    this.storage.set('notes',this.notes)
  }
}
And with this we can get to adding settings. For the purpose of this tutorial we would be using settings to change the theme of the application and restrict who can add notes to this app by requiring a secret key.
Head to your setting tab and add a toggle for the light and dark theme and another for the restriction to a secret key.
```
  Settings


  Dark Theme


  Require Secret Key